Does the Stihl BR380 Leaf Blower Use a Gas Mix?

Outside blowing off leaves stihl leaf blowers are helpful for lawn cleanup. However, if the motor isn’t treated properly, the machine will blow. To keep a Stihl BR380 working following the documentation, for quite a while is recommended, especially when it comes to refueling. BR 380s should be refilled with a mixture of gasoline and oil.

Fueling Directions

Select the gas and oil attentively, when refueling. Gas should be unleaded and also have less than an score. For petroleum, use only quality engine oil. Stihl urges a gas to oil ratio of 50 to 1 to get optimum results, meaning 1 gallon of gas for every 2.6 fluid ounces of oil. Mix thoroughly and just combine fuel. Add the oil into the mixing container first, and then add the gas.

See related

The Way to Acquire a Burnt-Grease Smell Out of a Kitchen

Fried foods are a delicious treat, but may cause an overwhelming odor of burnt grease in the kitchen. If not promptly treated, the stubborn odor lingers for days, finally migrating to other rooms in your home. While air freshening sprays deliver a burst of scent, they just mask bad smells. A couple of techniques permanently remove the noxious smell of burnt grease for a fresh and comfortable kitchen environment.

Eliminate the Evidence

Many men and women don’t realize that awful smells are not included solely to the food and grease. In order to take out the smell completely, you must also wash or dispose of items that came into contact with the cooking grease. Wash utensils and dishes which may be harboring grease residue. Towels and oven mitts might have absorbed the scent; launder these instantly in hot water. Even if your trash can has a lid, the smell of burnt grease may permeate the atmosphere. After cooking with oil, then remove any trash containing paper towels and napkins that came into contact with the cooking oil.

Nature’s Method

Fill a saucepan with 1 part water to 4 parts white vinegar. Simmer for at least 15 minutes permitting the vinegar to absorb and remove the smell of burnt grease. If you’re preparing food with oil, then use this technique whilst brushing as a preventive step. Smelly oil particles may fill the atmosphere in addition to land on walls, furniture and upholstery. Fill a spray bottle with the mixture and use it to spritz the atmosphere and any nearby upholstery. Use a microfiber cloth or clean sponge to wipe down upholstery and hard surfaces — such as countertops and cabinets — using the vinegar solution. Repeat until the smell is gone. Baking soda is another effective absorbent material. Fill out a couple cups with 1 cup of baking soda and set them around the kitchen to deodorize the room. In a pinch, place a piece of charcoal in a brown paper bag and allow it to sit close where scents are occurring.

A Herbal Remedy

While the scent of vinegar dissipates during the boiling process, some people today prefer to fill their houses with different scents. Begin the same way by boiling water on the stove and add a teaspoon of vanilla extract or essential oil such as eucalyptus, lavender, chamomile, jasmine or honey. Let it simmer for 30 minutes to an hour and your kitchen will be infused with the attractive scent of your choice.

When All Else Fails

If the smell still lingers, a deeper clean might be in order. Pull out the oven and stove to test for grease between cabinets and appliances, in addition to on the sides of themselves. Make sure you have all windows and a door open when cleaning the kitchen in order to promote the circulation of fresh air. Use the exhaust fan or another portable fan that’s handy.

See related

How to Clean Lime Scale on Fiberglass Showers

If you’ve got hard water, you’re probably knowledgeable about calcium carbonate, also called lime scale. This greenish-white buildup can clog your showerhead and leave spots on the shower door. Attempting to scrub lime-scale buildup off a metallic shower may be an exercise in frustration, because the mineral deposits are very hard. While you can purchase commercial products intended for removing lime-scale deposits, milder acidic cleansers may perform the job without the toxicity.

Vinegar or Juice

Mix 1/2 cup lemon or lime juice, or white vinegar using 1/2 cup warm tap water in a spray bottle.

Spray the lime-scale stains generously using the solution. Allow it to sit for at least one hour, spraying every 15 minutes to maintain the deposits moist.

Scrub the shower using a scrub brush or scrubbing sponge, spraying as required. If needed, scrub tight spots and fixtures using a toothbrush.

Rinse the bathtub with water and dry it using a squeegee or towel.

Vinegar and Baking Soda

Spray tough lime-scale stains using full-strength white vinegar.

Permit the vinegar to sit for at least half an hour, then respraying each 15 minutes if required to keep the surface moist.

Sprinkle baking soda over the stain.

Scrub the area with a scrub brush or damp scrubbing sponge, sprinkling on additional baking soda as required.

Rinse the bathtub with water and dry it using a squeegee or towel.

See related

The way to Get Permanent Marker Stains Off of a Polyester Fiber Couch

Created in several different upholstery blends, polyester fiber provides many benefits when woven with other materials. This synthetic material resists stains, stretching, many substances, wrinkling, mildew, heat and abrasion. It dissolves readily with water, but a few stains are not readily removed using soap and water alone. If you become permanent marker stains in your polyester fiber couch, resins from the ink cause the pigments to bind into the stuff. It’s possible to remove it from the couch without damaging the polyester using a typical solvent.

Dab the stain with rubbing alcohol on a fabric, or spray it with an very clear aerosol hairspray.

Combine 1 tablespoon of white vinegar, 1 tablespoon of mild dish detergent and 2 to 4 cups of warm water in a container. Alternately, use 1 part white vinegar and 2 parts warm water.

Dip a cloth into the solution and stain the permanent marker stain. Keep blotting the stain using the solution every five minutes till 30 minutes is up.

Dampen a clean cloth with cool water, and blot the stained place to rinse. Blot with a dry cloth to absorb any surplus water. If the stain is not completely gone, then continue with the next step.

Mix 1 or 2 tablespoons of plain ammonia and one teaspoon of mild dish detergent to 2 cups of warm water in a container.

Dip a cloth into the solution and dab the stain to apply the solution. Let it sit for 30 minutes, reapplying as needed to keep the stain moist.

Rinse the cleaned area with a cloth dampened with cool water, and blot any excess water with a dry cloth. Let it air-dry.

See related

What Could You Use in an Outdoor Fountain to Keep the Lime Away and Not Kill the Birds?

Birds like potable Water over themselves to cool down on warm summer days while cleaning dust and dirt off their masks. Should they like to frolic on your fountain, steer clear of the harsh chemicals found in many business lime removers. These can harm the birds as they bathe. Instead, stick to a few more natural ways to eliminate the limescale deposits, which often appear as chalky white or light green streaks or lines on your fountain. Nearly any fountain material can suffer from mineral accumulation, such as copper, concrete, resin, fiberglass, ceramic and steel.

Altering the Water

A simple fix to help keep lime from building up on your own fountain will be to change the water you use. Water from the tap contains antioxidants which can lead to limescale deposits, but draining the reservoir and replacing the water using distilled water can stop the accumulation. Distilled water also will help keep other regions of your fountain clean, like the pump and tubes.

Scrub-a-Dub-Dub

If you are able to wash out the fountain frequently, like every few weeks, utilizing a nylon-bristled scrub brush may be all you need. The brush lets you scrub any lime accumulation before it can become a problem, but only as long as the deposits aren’t overly thick. Consistent cleaning, even if you don’t see any lime, can make sure it doesn’t become a problem. In addition, it will help remove algae from the sides. Keep away from hard-bristled brushes that could scratch the finish on your fountain.

Rubbing With Vinegar

When you must remove significant limescale buildup without undermining the birds that like to dip on your fountain, use household distilled white vinegar. If you drained the fountain before cleaning, use a diluted mixture of 1 part vinegar into 9 parts water. When there’s still water at the basin you are cleaning, only pour some vinegar onto a soft rag and rub away the lime. It must dilute itself at the rest of the water. You may need to scrub the exact same area many times to remove the mineral deposits using the soft rag; without using an abrasive pad, the deposits can sometimes be stubborn. Abrasive pads are acceptable only on stone flats, like slate.

Avoiding the Bad Stuff

Avoiding harsh chemicals may protect the birds, but it may mean you need to scrub a little more difficult to eliminate limescale deposits on your fountain. Stick with a soft fabric for many fountain materials, and be insistent rather than switching to a more abrasive scrubber, like many dish sponges. Also avoid scrub brushes with metallic bristles that can scrape your fountain. Based on the fountain substance, the scratches may be nearly impossible to repair once they’re made.

See related

The way to Repair a Scratch on Porcelain

As durable as porcelain isalso the substance remains prone to scratches. Instead of replace the damaged appliance or item, buy a porcelain repair kit and then conceal the scratch. The repair won’t look exactly the same as the surrounding porcelain, but you can make the match close enough that few people will ever be able to tell it is there.

Pick a porcelain repair kit at a color that closely matches the object you wish to mend. If you know the manufacturer of the scratched object, you can contact the company for a kit which has a nearly identical color match.

Wash harassing items thoroughly using dish soap and water, and rinse well. Sinks may have soap buildup, and other things have debris or dirt, all which can may block how well the kit’s mend glaze adheres to the porcelain surface.

Sand the scratch quite gently with emery or even fine-grit sandpaper. The repair kit frequently supplies a little piece of sandpaper. Be careful not to sand beyond the scratch itself since you can damage the rest of the item. Sanding flattens the scrape, knocking down any ridges which might have formed on either side of the flaw.

Clean out the scratch using denatured alcohol to remove sanding debris.

Apply a thin layer of filler using the applicator that comes with the repair kit if you’re correcting a deep scratch — just one which gouges all the way down or into to the base material below the porcelain layer. Filler is not essential for lighter, more shallow scratches. Apply the filler in thin layers and then enable each to dry before adding another layer. Allow the final layer to overfill the scratch.

Level the stitch with a light sanding with emery or sandpaper.

Apply several light coats of glaze above the filler. Allow the glaze to dry completely between coats. Use glaze sparingly with each coat. Try to soften the borders so the glaze does not build up unnaturally.

Sand the dried glaze gently, then buff with a clean cloth.

See related

How to Fix a Concrete Front Stoop

Common in many homes, concrete stoops are rather durable, but can crumble and become broken, ugly and even dangerous when exposed to high traffic, icy and weathering. Most damage, though, can be repaired without going to the cost of replacing the whole stoop. Whether the stoop just has a couple of cracks, the corners have started to crumble or an whole step has to be replaced, then do-it-yourselfers can restore the attractiveness and durability of the front stoop with the proper tactics and techniques.

Remove any loose concrete in the areas to be repaired. Use a hammer and chisel to chip away at the area until you can’t remove any additional concrete with no overly exerting yourself and all remaining cement is solid and intact. Sweep away the consequent debris and dust and then spray down the area with a garden hose.

Construct forms around the regions to be repaired using plywood. Normally, L-shaped types work best on stairs. Support and hold the forms in place with bricks or other heavy objects.

Combine the concrete mix with water based on the product’s directions. Stir using a scoop until the desired consistency is attained.

Apply bonding agent to areas being repaired with a paintbrush so as to create the optimum adhesion between the new and old concrete. Pour the concrete mix into the types and use a trowel to perform the mix into smaller regions and shape the cement where essential. Run a wooden float above the moist concrete to achieve as smooth a finish as possible.

Cover the area being repaired using a plastic drop cloth. Weight the drop cloth with stone or bricks to keep it in position. Lightly spray the newly poured concrete once daily while it cures. Refer to this product’s literature for heal time.

Employ concrete resurfacer to the whole stoop so as to create a consistent colour and texture. Mix the resurfacer using water based on the product’s directions and apply a thin layer using a wooden float.

See related

Trees for Front Yards: Japanese Maple or Evergreen?

Trees are the bones of the front yard landscape. A tree provides vertical interest, shade and color. Evergreens stay green year around, typically a member of the conifer family such as pine or spruce. Japanese maple trees (Acer Palmatum) flip brilliant colors of crimson, gold and orange in the fall. Your front yard will be graced by either. Base your choice on many elements.

Focal Point

Both Japanese maples or evergreens could function as the focus of the lawn. Several types of maple transform a corner of the yard into a stunning riot of fall color. Pick a variety, such as coral bark (Acer palmatum “Sango-kaku”) which includes reddish trunks and stems for winter interest. Evergreen trees, such as blue spruce (Picea pungens), can also make a majestic focus.

Space

Japanese maples grow from 15 to 25 feet tall, are considered small as far as trees go. Evergreen trees vary in stature. Tiny Tower Italian Cypress (Cupressus sempervirens “Monshel”) grows slowly to 8 feet tall and then takes up to 30 years to reach 30 feet tall. The evergreen Douglas fir (Psuedotsuga menziesii) grows to 300 feet tall. In case you have a spacious yard of many acres you may think about putting the taller tree trees, while a smaller lawn would be inundated with only one giant conifer. Both Japanese maples and evergreens could be grown in pots. A pair flanking the front entry would welcome guests.

Color

Green is exactly what you get with an evergreen, although there are a few varieties which are streaked with yellow, such as Juniperus chinensis “Torulosa Variegata,” or white, such as Tsuga canadensis “Albospica,” where the newest growth is white and gradually turns into green. Japanese maples are green throughout the summer and spring and change color in the fall. However, there are a range of varieties which don’t wait until fall, however are brightly hued out of spring. Ukigumo is a Japanese maple with green leaves streaked with white and pink.

Privacy

Japanese maple trees aren’t typically used for solitude, fencing or to block unwelcome opinions. Evergreen trees fill the invoice if you would like to block the view of the traffic and street noise. The dense fine needles are set close together, forming a display that’s difficult to see through and stature is control by pruning.

Growing Requirements

Japanese maples prefer moist, rich soil and dappled shade in U. S. Department of Agriculture plant hardiness zones 6 through 8. Trees with green leaves may tolerate more sun. The growth is slow to moderate. Evergreen trees have a broader tolerance.

See related

Difference Between Japanese & European Plum Trees

Adaptable to different soils and climates, two main categories of edible plum trees, European (Prunus domestica) and Japanese (P. salicina), prosper at the western U.S. Both bloom in late winter or early spring. Fruit ripens sometime between May and September, depending on the cultivar and the weather. Expect Japanese plums to bloom and achieve harvest earlier. Maturity takes roughly 140 to 170 days for both types of plums.

Fruit Differences

Plums of all kinds are available in many colors, inside and outside. The range of skin colors contains yellow, red, purple, green, blue and almost black, while the flesh could be red, yellow or green. In general, the fat, juicy red ones are Japanese, although European types would be the smaller, purple, blue or purple fruits. But two old standard European plums, “Green Gage” and “Mirabelle,” are yellow and green, respectively. Prunes, a plum variety with sugar content high enough to enable sun-drying without causing fermentation, fall under the European group. European plums, which have firmer flesh, are often canned or made into jams or jellies, while Japanese plums are nearly always eaten fresh.

Pollination

Japanese plum trees are more prone than European varieties to require cross-pollination. Though most European plums are self-fertile, you may produce a better crop if you develop two or more varieties together, so long as they’re in precisely the same color group. “Santa Rosa,” a self-fruitful Japanese cultivar, is reputed to increase the yield of any other Japanese variety when both cross-pollinate. No one European variety is preferred over another as a pollinator.

Pruning and Training

In the orchard, both European and Japanese plum trees can reach 15 to 20 feet, with a slightly bigger spread. Pruning keeps them to about 10 feet in both directions. No truly dwarfing rootstocks exist for plums. Mature Japanese plum trees require more extensive pruning, cutting back side shoots to stop crowding compared to their European counterparts. Normally, Japanese plums are trained to a vase shape. When fruit types, the little plums must be thinned to you every 4 to 6 inches or so the fruit’s weight might break branches. Training a European plum tree to a single leader usually works best.

Outstanding Varieties of Each

“Coe’s Golden Drop,” a golden-fleshed plum having an intense apricot-like flavor and “Damson,” which has purplish-black green and skin flesh and excels in jam and jelly, are notable European plums. “French Prune,” the standard drying prune of California, and “Stanley,” sweet and hot and good for canning, stand from European prune varieties. All thrive in U.S. Department of Agriculture plant hardiness zones 5 to 9. One of the most flavorful Japanese plums are “Autumn Rosa,” a late-season plum with purplish-red skin, “Burgundy,” with dark red flesh and skin and “Santa Rosa,” a significant commercial variety for fresh eating. Each grows in USDA plant hardiness zones 7 to 10.

See related

Easy Landscaping Plants

Easy landscaping plants supply the same benefits as high-maintenance plants without unnecessary time consumption. They are easy to look after and can endure various undesirable growing conditions. When choosing the simple landscaping plant, think about the requirements of the area. For example, evergreen shrubs hide eyesores in the yard, while perennial flowers brighten a shaded corner in the garden.

Evergreen Shrubs

Easy evergreen shrubs are ideal plants to hide unattractive areas such as your home’s foundation. “Rotunda” dwarf Chinese holly (Ilex cornuta “Rotunda”) is just a 3- to 4-foot-tall evergreen tree growth in U.S. Department of Agriculture plant hardiness zones 7 through 9. This low-maintenance plant has a round form with spiny leaf and dense divisions. “Rotunda” does not flower or produce fruit and grows in full to partial sun. Peacock blossom (Caesalpinia pulcherrima) is a semievergreen tropical tree growing in USDA zones 8 through 11. This sun-loving plant produces ferny foliage and magnificent red and orange flowers which attract butterflies and hummingbirds. It is a quick grower, reaching heights between 8 and 10 feet tall. Peacock blossom is an easy-care plant which tolerates drought and works well as a hedge plant.

Ground Covers

Ground covers are versatile plants which suppress weeds and hide the awful ground under trees, shrubs and flower beds. Japanese holly fern (Cyrtomium falcatum) is a 1- to 3-foot-tall spreading evergreen with dark fronds. It’s a low-maintenance plant growing in nesting places in USDA zones 6 through 11. Goldmoss sedum (Sedum acre) is a succulent evergreen ground cover creating yellow, butterfly-attracting flowers in the spring. It grows 3 ins tall in bright regions in USDA zones 3 through 9. The deer-resistant goldmoss sedum is drought-tolerant once established and requires little to no upkeep.

Perennials

Low-maintenance, simple perennials brighten up places with vibrant blossoms that attract beneficial insects. Butterfly gaura (Gaura lindheimeri) is also an easy-to-grow flowering perennial creating continuous sprays of white flowers blushed with pink through the summer and fall months. It grows in full sun to partial shade in USDA zones 5 through 9. Butterfly gaura is drought-tolerant and resistant to deer. Cape leadwort (Plumbago auriculata) is a broadleaf evergreen perennial found in USDA zones 8 through 11. It grows between 1 and 3 feet tall in full sun to partial shade. Cape leadwort produces pale blue flowers during the growing season.

Trees

Easy landscape tree “Akebono” yoshino cherry (Prunus x yedoensis “Akebono”) is a flowering ornamental tree growing in USDA zones 4 through 8. It reaches heights of up to 25 feet in full sun. “Akebono” produces an abundance of fragrant blush-pink flowers in March and April. This tree requires weekly watering but is usually easy to grow. The cornelian cherry dogwood (Cornus mas) is just a low-maintenance tree growing in USDA zones 4 through 8. It reaches heights of 15 to 25 feet in full sun to partial shade and tolerates clay dirt and deer. In late winter, yellow starlike flowers look and are followed by bird-attracting red drupes. Cornelian cherry dogwood works well as a hedge or privacy tree when planted in masses.

See related

How to Replace a J-Bend at a Bath Sink

The J-bend under the sink is also known as the P-trap, the U-bend and at times even only the drain trap. When there are a number of subtle differences between each of those fittings, they essentially mean the specific same pipe in a drain pipe system. Typically you’ll need no tools to get this repair since the joining nuts have been made to function as hand-tightened. In some cases, however, hand-tightening may not seat the drier correctly, particularly if your drain pipes are metallic, so slip-joint pliers may often be convenient.

Place a bucket under the J-bend pipe. Unscrew the compression nuts together with your hand, or if they don’t come loose, use a slip-joint pliers, turning them counterclockwise. As this is a drain trap, water is likely to be found inside the pipe. When the nuts are loosened, tip the J-bend upside down and drain the water into the bucket.

Inspect the compression washers as well as also the compression nuts. Generally, the compression nuts will be sound and are reusable. The compression washers can at times be reused; nevertheless, if there aren’t any cracks, pits or tears in the compression washers, they can’t be reused and must be replaced. Metal pipes will be fitted with rubber washers. These must also be examined and replaced if needed.

Acquire the exact copy of this J-bend you’ve eliminated. This is vital because the pipes under the sink were plumbed to match that specific size and style of J-bend. If any other sort of J-bend is employed as a replacement, you’ll have ill-fitting drain pipes that will be prone to leak. J-bends are available at hardware stores or garden and home or pipes shops. Generally, they are sometimes discovered in kits that have a new pair of washers and compression nuts.

Remove the J-bend in the bundle and dry-fit the pipe. It has to match up exactly. Then set the washers into the beveled edges of this J-bend and attach them in to place together with the compression nuts. Turn the nuts hand-tight, then check to see whether they leak from running water in the tap down the drain. If there is a slight leak, tighten the compression nuts 1/4-turn with slip-joint pliers. For alloy connecting nuts, dab plumber’s pipe dope onto the threads before tightening them down.

See related

Flexible Door Sweep for Garage Doors With Uneven Floors

A door sweep is a strip of flexible material in the base of a overhead garage door that makes contact with the ground to seal out rain and wind. If your garage floor is uneven, it can be hard to obtain a good door-bottom seal. But you can make an effective self-adjusting door sweep from inexpensive preformed slit foam insulation sized for pipes of 3/4-inch diameter. This type of pipe insulation is sold at hardware and home centers.

How to produce

Buy enough of the pipe insulation to match the width of the door. Open the door so the underside is head high. Place the pipe insulation over the bottom of the door so the slit will face down as soon as the door is shut. Expand the slit apart so that you can fasten the insulation to the door with screws. Use enough screws to securely hold the material. Add washers to the screw heads to stop them from tearing during the pipe insulation. If the material tears with usage, it is not hard to replace. In case you have a wooden door, you are able to simply nail down the pipe insulation to the back of the door with 4d box nails so that the insulation presses against the ground once the door closes.

See related

Spring Lawn Care for Female Spots

Dogs are beloved family members and loving companions, but their potty habits can wreak havoc on lawns. Dog pee includes a great deal of soluble salts and hydrogen peroxide. Small amounts of urine can fertilize the affected grass, causing it to be more dangerous and more vigorous than the turf about it. Massive amounts of urine can cause brown patches of dead grass surrounded by a halo of lush, deep-green grass. Taking steps in spring to correct dog area problems will help keep your lawn looking uniformly healthy and green.

About Female Spots

Green dog places are circular patches of grass typically reaching 4 to 8 inches in diameter. When brown dog places look, they generally have a 3- to 6-inch circle of brown grass surrounded by a halo of deep-green grass extending about 6 to 12 inches in diameter. Dogs frequently make pit stops at the exact same place throughout winter. So dog spots typically become evident in early spring, once the grass comes from dormancy. Although puppy spots can arise in any type of grass, their harm is usually most severe in cool-season grasses, such as Kentucky bluegrass (Poa pratensis), that is hardy in U.S. Department of Agriculture plant hardiness zones 3 through 9a and dangerous in certain locations. Warm-season grasses spread via rhizomes and stolons, which allow websites affected by even big dog spots to repair themselves with time. The warm-season varieties burmudagrass (Cynodon spp., USDA zones 7 through 10), some species of which can be invasive in certain places, zoysiagrass (Zoysia spp., USDA zones 6 through 9) and St. Augustinegrass (Stenotaphrum secundatum, USDA zones 8 through 10) hold up nicely to your dog’s potty habits. Keep an invasive grass variety mowed and confined to block it from spreading.

Rinse Them Away

Small, brown dog spots in grass are usually straightforward to fix when they look in spring. The University of Wisconsin Extension implies leaving places smaller than the size of the fist alone. The surrounding turfgrass must fill these spots rather quickly. Simply rub each affected area with water from a garden hose to help dilute the accumulated salts and revive turfgrass. Treat green dog areas with no browning in the middle by keeping your usual watering program to stop the salts from building up in the ground. Dry conditions often allow the salts to accumulate to the point at which they harm or kill grass.

Reseed the Areas

Larger brown dog spots in grass have to be overseeded. Spring is an perfect time to overseed since grass seeds germinate best when temperatures range from 60 to 80 degrees Fahrenheit. With a seed mixture or a lawn-patch seed mix that matches the remainder of your property’s grass will keep the lawn uniform. Rake up as much of the dead grass as you can in each dog place website, and eliminate the best 1/2 to 1 inch of soil, taking care to not hurt the healthy turf surrounding each website. Heavily watering the affected areas for three times in a row helps to dilute the salts in the ground. Adhering to the instructions on the seed item’s tag, sprinkle the mixture over every dog spot’s entire location. Gently rake the seeds to the soil, taking care they do not go more than 1/2 inch deep. Water that the seeded areas thoroughly, irrigate them twice each day, keeping them moist but not too wet, until the new grass grows about 3 inches in height.

Increase Nitrogen

Feeding your lawn in early spring using a nitrogen fertilizer will help mask deep-green puppy spots. Each fertilizer has three numbers on its bundle tag. The numbers indicate the proportion of nitrogen, phosphorous and potassium in the fertilizer. If your basement has established grass, then use a fertilizer that has a nitrogen-phosphorous-potassium proportion of 3-to-1-to-2, such as an 18-6-12 fertilizer, that is 18 percent nitrogen, 6 percent phosphorous and 12 percent potassium. Feed your lawn 1 pound of available nitrogen for every 1,000 square feet of growing space. If, for instance, you use an 18-6-12 fertilizer, then implement about 5 pounds of that fertilizer on every 1,000 square feet of turfgrass. Fertilizer manufacturers’ instructions vary. So carefully read and follow the instructions on your fertilizer’s label.

Prevent Dog Spots

Help prevent future dog spots by training your pooch to go potty in a particular lawn area, such as an out-of-the-way part of yard, a place mulched with wood or one or gravel with tall grass you never mow. Thoroughly rinsing grass with water immediately after your dog urinates helps dilute the number of salts and sulfur which reach the soil. A whole lot of myths exist about dog spots, such as people who suggest changing the pH level of a dog’s urine using nutritional supplements or dietary alterations. No evidence is that these steps work, however, and never add nutritional supplements or change your dog’s diet plan before you seek advice from your vet.

See related

How to Grow Head Lettuce at a Greenhouse

Having a passive solar greenhouse — browse no electric heating required — you can develop head lettuce (Lactuca sativa L.) through the winter in frost-prone areas. In some frost-free areas, even a greenhouse is unneeded, but with the additional protection offers peace of mind through a cold spell. During warm spring, summer and fall months, it is too hot to develop this cool-season crop in a greenhouse.

Soil Amendments and Sun

Lettuce needs full sunlight, so put the greenhouse in a spot that gets at least six hours of direct sunlight every day. Fill the bed with loamy topsoil leaving 2 inches of space at the top, then add 1 to 2 inches of compost to the bed. Mix the compost thoroughly with the ground down 6 to 8 inches using a garden fork. Insert a balanced fertilizer — like a 10-10-10 formula — to the bed and blend it into the soil. Use 12 tablespoons for an 8-square-foot-bed.

Spacing, Thinning and Watering

Space head lettuce 12 inches apart. If you’re growing from seed, thin the seedlings when they get 3 to 4 inches tall to your 12-inch-spacing. You can use the thinned lettuce seedlings as new greens. Stagger head lettuce for greenhouse planting rather than creating proper rows to get more plants in the restricted space. Water the bed once per week or when the ground dries our 1 to 2 ins. If the greenhouse gets hot, the soil will dry out rapidly, so check daily in warm weather.

Greenhouse Temperatures

Keep the greenhouse between 50 and 70 degrees Fahrenheit during the afternoon. If it gets warm out, then open the doors so the air inside can cool off. Ideal night temperatures for lettuce are between 45 F and 55 F. Lettuce can survive brief cold spells at 35 F, especially when shielded in a greenhouse. A few days at 90 F will pressure lettuce but will not likely kill it. Keep the soil moist and circulate as much cool air as you can during warm spells.

Fertilizing Mid-season

Three weeks to a month into the growing season, give each mind lettuce plant a boost using 1 tablespoon of balanced 10-10-10 fertilizer. Scatter the fertilizer on the soil around every lettuce plant, then water until the ground is damp 5 to 6 inches deep. To avoid overwatering, schedule the mid-season fertilizer with one regular weekly watering. Weeds are rarely a problem in a greenhouse, but if any dip in, pull them manually. Lettuce has shallow roots, so weed carefully to avoid disturbing them.

See related

Feng Shui Bedroom for Bad Spirits

The fundamentals of feng shui tackle the stream of good and evil energy, called chi and sha, into your home. Since feng shui professionals and consultants operate from the premise that energy imbues everything, both living and nonliving, the clinic has remedies for dealing with bad spirits — those nonliving entities that feed on negative energy. The very first step is always to use feng shui to change your bedroom’s energy to positive, that rids it of ghostly energies that thrive on capitalism.

Optimum Bedroom Layout

The perfect way to fight negative energies that attract woeful entities starts with the optimal bedroom design. Face the foot of the bed from a straight-on perspective of the door. Set the bed so the door opens diagonally to the left or right of the bed foot board on the wall, never straight on. Place the bed against a wall, not just a window, however, make certain that a sink, cooker or toilet doesn’t lurk behind the wall where the bed rests.

Exorcise the Mirror

Mirrors generally represent great feng shui energy in your house — except in the bedroom. A symbol for water, a mirror can amplify negative energy at the space and bring about unwanted interference to your relationship, particularly in a few bedroom. When it’s directly across the bed, then it can result in insomnia since it doubles the energy already in the space. Mirrors function best in different rooms of the house in which they duplicate a gorgeous landscaped perspective, as at the dining or living rooms.

Pei Yow Foo Guardians

The Chinese Pei yow dogs can be utilized as a pair or singularly in the bedroom. Though they seem like a lion, they’ve a Peking dog face and may have a single horn on their heads. The Chinese foo dog is mainly used as protection against negative energies and bad spirits. You discover them guarding the doors to affluent Chinese palaces, residences and tombs alike, since the legend connected to the creature tells of its consumption all of the negative energy or sha. Displaying them in a male-female pair on either side of the bedroom door or in the foot of this bed protects the bedroom and its own inhabitants.

Inferior Spirit Cures

When your master bedroom is located on the north or northwest side of the house, place metal wood chimes outside, close to the room. Chimes of all kinds — steel, wood and ceramic — each type has different results and places where they achieve the best results. Metal chimes from copper, brass, bronze or copper with five poles help to suppress negative energy and bad fortune. To energize and bring fortune to your relationship, add rose quartz puffed hearts or other enjoy symbols in the southwest corner of your bedroom.

See related

Do-It-Yourself Children's Night Stand Made From Colored Storage Cubes

Kids have a good deal of stuff. They also demand a surprising amount of furniture, so it is a bonus when you are able to double-purpose necessary furnishings with storage, and even better when the storage can be reconfigured as children grow. Visualize those vibrant storage blocks you snagged to hold the toddler blocks as nightstands and bookshelves plus concealed storage which needs almost no effort from you and may be broken down tomorrow and then reconfigured into something different.

Plastic or Wood Cubes

Come up with the notion behind the type of storage you need from bedside blocks. Bookshelves need the blocks to be stacked with both open sides facing the exact same manner. Hidden storage allows you set one cube open-side-up and top it with the next cube, open to the side.

Drill a hole an inch in the edges in all four corners of the base of the greatest cube. Drill a hole in each of the front and back faces of the bottom cube, which will sit open-side-up on the ground. The holes in the bottom cube must be 1 inch from the top and one inch in from the side. Measure before drilling to ensure the holes in the bottom and top cubes lineup.

Place the items to be seasonally or longterm saved in the lower cube. Establish the side-opening cube in addition to the decrease cube and secure the two together with cable ties threaded through the holes in each of the four corners.

Place a lamp, clock and other bedside comforts on the flat surface of the highest cube. Use the reachable open inside of the highest cube for a shelf to store objects which are frequently used, like novels, favorite toys, bedtime animals or a audio player.

Clip the leading cable ties to lift the top cube up and eliminate seasonal storage items in the bottom cube. Alter the cable ties to re-secure both blocks collectively.

Wire Cubes

Assemble individual cable cubes according to the manufacturer’s instructions. Most cable blocks only snap with plastic links.

Snap two constructed blocks together, one in addition to another with both openings facing the identical side, utilizing the straps offered by the manufacturer. If the straps don’t look secure enough, then see Step 3 for an alternate fastening approach.

Stack 1 cube on top of another, with both open ends facing the side, in the exact same direction. Combine the blocks with plastic wire ties.

Cut a piece of thin plywood the size of one side of a cube. Sand the edges until they are smooth, prime and paint the plywood with high gloss enamel on either side.

Drill a hole in each corner of the painted plywood. Set the plywood in addition to the greatest cube. Thread a cable tie through every hole, grabbing a strand of the cable cube from the wire loop; pull the loop tight to secure the plywood into the cube.

Decide on a lamp or nightlight and a box of tissues on the nightstand and stash novels or stuffed animals from the cube shelves.

See related

Attaching to a Cabinet

Attaching a sink top that is molded to a toilet cabinet is among the easier renovations for updating a toilet in your property. There are a huge variety of sinks, from stone and concrete to surface that is solid and molded and poured kinds. Faucet base and the sink top are sold separately, so you want to quantify your sink foundation. The fantastic thing is that sink base cabinets are for the most part standard and it’s usually simple to locate the fit that is right. Finishing the attachment only takes a few minutes.

Remove your sink that is molded in the box and place it. Place your faucet gasket over the holes in the sink. Add your faucet pipes through the holes. Screw the plastic nuts provided with the faucet. The faucet is held by these nuts to the sink. Tighten the nuts finger tight.

Wrap plumber’s tape around the threads of one of those pipes. Screw the nut of the hose to the pipe. Tighten with a wrench. Repeat for the hose.

Apply a bead of silicone adhesive around the edge of the sink cupboard. Lift the sink up over the cupboard. Reduced and center the sink over the cupboard so the counter top contrasts with the rear wall and sits snug on the cupboard.

See related

What Is the Difference Between Quitclaim Deed & a Warranty Deed?

One of real-estate legal records, the warranty deed and quitclaim deed are all key to nearly all transactions. Both of these records are essential to the sales transaction; they’re necessary to legalize the transfer of property from seller to buyer. Warranty actions and quitclaim deeds have similar purposes, but they offer different levels of protection to this buyer.

Characteristics of Warranty Deeds

The warranty deed is produced and signed by the vendor at the real-estate final. It includes a full legal description of the property, and pledges that the seller owns clear title to the property changing hands. The warranty deed additionally guarantees that the land is free of all liens and encumbrances. The individual signing the deed and communicating the land is the grantor or transferor; the individual receiving the deed and the land is the grantee or transferee.

Function of Warranty Deeds

The warranty deed (also called in California as a grant deed) is a form of insurance to the buyer. In effect, this type of deed guarantees that the land he or she is purchasing belongs to the vendor free and clear and is not the topic of any claims by third parties. If a claim is presented to the buyer after the transaction is closed, then the seller who has issued the warranty deed is legally responsible for compensating the buyer for any damages or collection activities.

Functions of Quitclaim Deed

The quitclaim deed is often used when the property is not the topic of a conventional sales transaction. Quitclaim deeds are frequently utilized to convey property through a will or as a gift, or with a third party, such as a trustee for a charity, or who’s legally responsible for that land. Quitclaim deeds are also used when land boundaries are uncertain, or from grantors who are conveying the property to your spouse–as in the case of a divorce proceeding–or to business partner. The grantor of a quitclaim makes no guarantees he or she owns legal and clear title to the property.

Insurance Benefit

Warranty deeds could be further strengthened with some form of title insurance, which compensates the property owner in the event of any third-party claim on the property. Quitclaim deeds aren’t endorsed by name insurance, so offer you a lesser level of protection to the grantee.

Significance

Warranty actions and quitclaim deeds aren’t revenue records. They don’t carry information regarding sales price, mortgage loans, taxes or any other financial part of the transaction. Rather, they help protect the buyer against present or future claims against the property. With no signed and witnessed warranty or quitclaim deed, a property transaction is faulty.

See related

Cautions for Selling Mineral Rights

Mineral resources are”all precious rocks, minerals, gas or oil found on or inside the Earth,” according to Geology.com. Ownership of the rights to those minerals varies by country. In certain states, ownership is linked to the property where the monies are located. Other states permit different ownership of mineral rights and the related property. In these states, you may sell or lease your mineral rights, even in the event that you have no longer have the related property. Cosmetic rights have the capability to make value, now and in the future, and you need to exercise caution before purchasing them.

Future Value

In the event you sell your mineral rights, then you are gambling that the one-time payment you receive is worth more than the possible future value of these minerals. When you sell your rights, then you lose all chance to benefit from the future exploration and excavation or extraction of those minerals. One advantage to selling is you receive immediate repayment for the mineral rights, regardless of whether they are generating. However, the future extracted value of those minerals could significantly exceed the upfront sales value. There is A careful approach to lease your mineral rights. Oil and Gas Mineral Services clarifies that most energy business will lease mineral rights to explore and extract. In exchange for granting the company those rights, the owner of the rights receives a bonus once the lease is signed, plus royalties if and when the minerals are in reality produced. The owner retains his mineral rights, so if the energy company’s lease expires before beginning to extract the mineral, then the owner of the right is subsequently free to lease it to another corporation.

Estate Planning

Cosmetic rights are an asset that may be passed from generation to generation, whether they are generating or not. Ownership interests can be divided between your heirs in any way you see fit, and those heirs will benefit from future mineral production. In the event you sell your mineral rights, then you lose the chance to pass this advantage to future generations.

Property Damage

If you have the mineral rights to your property, you may sell the rights without promoting the property. However, the State of California Department of Conservation warns that the person who owns the mineral rights related to your property may use the surface if necessary to research and extract. By way of instance, a part of your property might be used to house a drilling rig and pipeline equipment. As the property owner, you can’t utilize this part of your property for other purposes, such as grazing livestock or structure of a house or outbuildings. The real estate owner receives damages for loss of use and land damage, but the real value goes to the mineral rights owner. If you retain the mineral rights, then you have control over how your property is utilized.

See related

Ideas to Improve the Appraisal of a Home

In a volatile real estate market, an appraisal may mean the difference between selling your house for the asking price and never have to settle for a discounted deal. Mortgage lenders rely on house assessments to ascertain how much money they’ll lend for the purchase of a house. Home appraisals are based on the selling price of similar homes in the area; the prices is a comparative price. If your house looks better than many, your appraisal will likely be higher.

Curb Appeal

First impressions count. Improve what real estate brokers call”curb appeal.” Trim bushes, pull weeds, plant attractive flowers and tidy the landscaping. Make sure that your entire yard is as great as, or better thanjust about any yard in the area. An appraiser will determine your home’s worth by comparing it with other people in your area, so make sure your house looks better than the rest.

Those Little Repairs

An appraiser that sees small repairs that were put off might think that larger repairs have been treated exactly the same way. Locate all the small fix-it jobs around your house and take good care of these prior to the appraisal. Tighten screws, replace lightbulbs, nail loose weatherstripping and do any of those other jobs that you have been putting off.

Gather Records

Create a folder with pertinent information about your house to give to this appraiser. Include documents on any enhancements that you have made to the house, like a new roof, a remodeled kitchen or an extra bath. Compose a list of features that your home has that the neighbors could be missing, like an in-ground pool or a fourth bedroom. Add this listing to the folder. Also include any info you might have on the purchase price of homes sold in the area in the previous six months.

Modernize

Take an unbiased look in your house to check for obsolete and outmoded fittings and paint choices. In case you haven’t redecorated in over 10 decades, you might have to freshen up your home’s appearance. Replace any outdated fixtures like ceiling lights with clean-lined modern variants. Remove outdated wallpaper and paint the walls a neutral shade. Don’t go for trendy and modern, but try to create a timeless appearance.

See related

Mortgage Deferment Payment Options

Since the housing market downturn took hold in 2007, lenders have gotten inventive when helping homeowners who have defaulted or are in danger of defaulting on their mortgages. While creditors can cancel, or forgive, a part of a homeowner’s debt, particularly in the event the homeowner is in an unaffordable loan, deferment options are different. Under a deferment scenario, homeowners are still on the hook for the payments a lender has agreed to put to the back burner.

Repayment Plan/Reinstatement

Since HUD notes, homeowners must phone their lender in anticipation of missing a mortgage payment. In the very least, borrowers must make the call soon after missing a payment. The more payments a homeowner misses, the closer she goes toward foreclosure. The Federal Trade Commission (FTC) asserts that banks frequently agree to a repayment plan, where the homeowner pays the past due amount as time passes by adding portions of it to his regular mortgage payment. Similarly, a reinstatement involves paying the entire past due amount, plus penalties and interest, by a mutually agreed-upon date. The FTC points out that these choices are best for homeowners with short-term mortgage issues.

Forbearance

Under a forbearance, a mortgage lender agrees to suspend or lower a homeowner’s mortgage payment for a particular duration. Unlike reinstatement or a repayment program, which are inclined to occur after a homeowner has fallen behind on payments, a forbearance is a proactive measure. In the end of the forbearance period, the FTC explains that periodic monthly mortgage payments resume along with a lump sum or partial payments for the delinquent amount.

Extension

An extension is much like the above-mentioned alternatives; however, as Bank of America particulars, after a forbearance period, the missed payments have been tacked on to the end of the homeowner’s loan, extending its duration. According to Bank of America, this option is feasible if the homeowner is less than 90 days late on her loan and dealing with a temporary financial issue.

Balloon Payment

Some mortgage aid programs, including the president’s Making Home Affordable modification program, utilize a balloon payment. A modification alters the conditions of a home mortgage in an effort to create the monthly payment much more manageable for the homeowner. Frequently the lender chooses to lower the principal balance of this loan to attain this goal. As the Building Home Affordable website information, sometimes lenders require that the homeowner to pay back the amount of the principal reduction at the end of the loan or on a refinance or purchase. This payment is called a balloon payment.

See related

Orange for Fun — and Yes Versatility — Around the Home

Quick: What’s the first thing you consider when you hear the word “orange”? The fruit? Halloween? Traffic cones? Unfortunately, a number of the associations we have for this colour relate to threat. (Believe prison uniforms.) It’s no surprise that so many of us avoid using it in our homes.

However, when the experts at Pantone chose Tangerine Tango as the Colour of the Year for 2012, they gave us a fresh Method of looking at orange. No longer reserved for autumn decorations or Halloween festivities, distinct orange colors can fit into virtually any home. “Folks should provide orange another appearance,” says California colour adviser Christina Harris. “They could possibly not be aware of how fun and versatile this colour can be.”

We talked with Harris and three other colour experts around the United States to find out more. Here’s their insight regarding how you are able to present this overlooked colour in your property.

Jill Sorensen

Why Is There an Aversion to Orange?

Orange tends to get an instant negative response — more than other colors. “Orange has the ghoulish custom of getting garish without a lot of effort,” states New York color adviser Debra Kling. Normally, orange elicits a mental image of a bright, showy colour. It may get too pink or yellow very quickly. Its reputation as a Halloween colour, additionally makes it hard for many to envision incorporating it in their dwelling.

Kailey J. Flynn Photography

“From the expert side, oranges are catchy,” states Harris. “The idea of the ‘correct’ orange changes as time passes. Even Nike’s trademark swoosh isn’t the exact same orange year after year. It changes tastes change about what’s the current orange.”

TILTON FENWICK

Utilize Orange as a Accent

Even when muted, orange calls attention to itself. This makes it a great choice for a burst of colour on one wall, piece of furniture or accessory. Massachusetts color adviser Barbara Jacobs suggests using orange for a focus in a room, and picking complementary or contrasting colors and textures to the surrounding area.

LLC, Cristi Holcombe Interiors

With the right tone, orange may work with virtually any colour. “Hits of orange disappoint,” states Seattle color adviser Elizabeth Brown. “Orange candles, runners and pillows are all great candidates for a simple, affordable way to inject such a wonderful colour into the mix.”

markdesign, llc

Pick the proper Hue

Orange has just as many permutations and colors as different colors, which may allow it to be comparatively elastic. Think about the emotion you want your area. “A bright orange can be very pleasant, but a more muted orange — especially beside another colour — may be very comfy and warm,” states Harris.

Sarah Greenman

Darker hues can lean toward red and brown. The saturated oranges will feel much more muted when surrounded by cool grays and other neutrals.

Ian Stallings

Decide just how much orange you are intending to use before picking a colour. If you are painting an whole room, brighter oranges will be catchy. But if you are using it for small accents, you will have more flexibility.

“Stay away from the orange that resembles those fake-peanuts Halloween candy,” says Jacobs. “Keep it rich and deep.”

When designing interiors, Kling often employs apples with bronze undertones. “I generally find it’s easier to utilize yellow-oranges and brown-oranges at a house setting,” she states.

The Couture Rooms

Start Small

Not sure where to begin? Keep in mind you don’t need a lot of orange for it to be effective, so start with small doses.

The Workshops of David T. Smith

An orange entrance door may work well in any location. “Strive painting a orange front door when you were initially contemplating red,” says Kling.

Diego Alejandro Interior Design

Just one orange pillow, vase, candle or throw may be an inexpensive way to experimentation with the colour.

Rikki Snyder

Utilize a bowl of oranges as an accent.

Jones Architecture

Paint one wall or portion of a wall using a swath of orange. If you do not like that, just paint it back.

Axis Mundi

Insert an orange carpet runner to the staircase of a house having an otherwise neutral palette.

“In the end of the afternoon, just choose the colour you like,” states Harris. “You are going to live with it, and no one will be reviewing your own colour choice. Do it if you want it. Go small or move large. It’s all changeable, therefore it can be well worth it to try something new and fresh.”

Watch more guides on How Best to use orange in your home

See related

Two Decades Hone a Ju-Nel Home to Perfection

Rick Hibbs considers that great homes aren’t about storage or shelter, but about creating chances for encounters. Directed by this sentiment, Rick, an architect, and his wife, Susan, patiently spent two years renovating their 1959 midcentury home, constructed by architects Lyle Rowley and Jack Wilson of Ju-Nel Homes. Theirs was the first home built at the Lake Highlands area of Dallas from the Ju-Nel team.

During that 20 decades, Rick and Susan remained focused and busy. They upgraded the kitchen, bathrooms, windows, floors and surfaces; enlarged the principal bedroom and living room; added a family room; and constructed a pool in the backyard, doing much of the work themselves. Their decision making that was slow allowed them to approach each phase of renovation. “We’ve always made our conclusions just for us,” Rick says. “That is, we built it to our own way of life rather than based on traditional ideas about what a house should be.”

at a Glance
Who lives here: Rick and Susan Hibbs; sons Wesley (age 14) and John (11); Jessie that the Jack Russell mutt; Robo dwarf hamsters Larry, Moe and Curly; along with some fish
Location: Lake Highlands area of Dallas
Size: 2,900 square feet; 3 bedrooms, 3 baths

Sarah Greenman

The first phase of remodeling the home, which occurred from 1994 to 1996, consisted of cosmetic upgrades into the kitchen and installing new surfaces in the living and dining rooms. “Opening up the walls of the kitchen allows us to participate in everything that’s going on, while preparing a meal,” Rick says.

Sofa: Florence Knoll; coffee table: Noguchi; feces: Herman Miller Eames Walnut Stool B

Sarah Greenman

Rick installed custom wood windows . From the living space, they run the whole length of the rear wall, offering a great view of the yard and pool area.

After viewing countless ranch homes in the area during their first home search, the couple asked their Realtor to find something much more interesting. That’s when they found that the Ju-Nel home. “I walked straight through the house to the yard and explained instantly we’d take it,” Rick says.

Lounge seat: Womb Chair, Eero Saarinen; artwork: giclee canvas print, Copralux

Sarah Greenman

Floor-to-ceiling maple shelves highlight the ceilings and provide space for artifacts and books. “Modernism is all about honesty in using materials, allowing them to express their usage and ease without extra ornament,” Rick says. “I think our home is an extension of those ideas. We have spaces, finishes and furniture that reflects the way we live: open, flexible and functional.”

Theater seats: Eames Lounge and Ottoman

Sarah Greenman

“I was not going to get a preservationist approach,” he states. “I followed the model that was set but also desired a 21st-century sensibility.”

Bar stools: Delta by Mart Stam; counter area paint: Renoir Red, Sherwin-Williams

Sarah Greenman

As an architect, Rick takes inspiration from a broad swath of modernist designers and artists. He loves Charles Rennie Mackintosh from the 1890s, German Bauhaus from the early 1900s, American and Danish performers from the 1950s along with the Italian modernists of the 1980s. These influences come up all around the home, particularly in the dining room, where converging lines, natural surfaces and organic forms unite.

The oil painting on the far wall is a spectacle of the Trastavere area in Rome, purchased at the Piazza Navona when Rick and Susan were there in 1998.

Sarah Greenman

Dining seats: Brno Tubular Chair, Mies van der Rohe; pendant lights: Le Klint 172 by Poul Christiansen; trio of prints: Wassily Kandinsky

Sarah Greenman

Rick designed the front doorway, mail slot and sidelights; his father built all of them. Slate flooring reflects the original entrance layout, which was terrazzo tiles. Rick designed the handrail around the descending stairs into the right and had the steel frame fabricated. He along with his father carved the cherry handrail, made the maple panels installed them at the frame.

“We spent the first 3 years in turmoil, under construction from the moment we moved in,” Rick says. “When you perform the job yourself, it is a part of you, and you have the choices and the results from the very beginning.”

Print over stairs: Picasso; Persian carpet: Irani Hamedan routine

Sarah Greenman

This is one of Rick’s favorite views in the home. The accent wall gives a beautiful backdrop for a George Nelson platform bench plus a Willem de Kooning print. The pottery on the bench, a present from Rick’s parents, has been created using the horsehair raku method.

Wall paint: Renoir Red, Sherwin-Williams; area carpet: Iranian prayer rug

Sarah Greenman

The principal bedroom, which was enlarged in 1998, has a different tree house feel on account of the wall of windows framing the canopy of a massive pecan tree in the backyard. “I’ve a love-hate relationship with the pecan tree,” Rick says. “The foliage is amazing, but it seems like there is not a month from the year if its not dropping pecans.”

An accent wall, inset and painted red, acts as a headboard for the platform bed.

Chairs: Wassily, Marcel Breuer; accent wall paint: Renoir Red, Sherwin-Williams

Sarah Greenman

The Wassily Chair, a modern classic, pairs well with a Persian rug woven in a Chechen pattern. Pictures taken by Rick to a family trip hang at a trio within the seat.

Since Rick is an architect, he and Susan were able to purchase most of their furniture straight from producers. The Hibbs also like to shop for home goods at Collage, a secondhand modern furniture shop in Dallas.

Sarah Greenman

Sarah Greenman

The bath has one on the opposite wall along with two closets, one envisioned here. Rick designed and constructed the habit hinged mirrors. He used exactly the same style in all of the house’s three baths. The watercolor over the bath was purchased in Rome from a street artist.

Credenza: Florence Knoll

Sarah Greenman

Son Wesley’s room is a well-appointed space using a twin bed and leather Poäng chair from Ikea. The couple bought the mobile, designed by Alexander Calder, from the Art Institute of Chicago. The window treatments are custom-made room-darkening Roman shades.

Pendant lampshades: Skimra, Ikea

Sarah Greenman

Son John’s room is comparable to Wesley’s, using a twin bed and workstation. The artwork print over his desk is “Zero to Nine” by Jasper Johns. The mobile is the Mondrian Mobile from Greenberg Kingsley. Both pieces were purchased from the Art Institute of Chicago.

Pendant lampshades: Skimra, Ikea

Sarah Greenman

The grass-green hall bath, shared by both sons, includes limestone floors. The framed artwork is a print of “La Joie de Vivre” by Henri Matisse.

Countertop: granite, Gallo Veneziano (used throughout home)

Sarah Greenman

Formerly a large storage space and an unfinished bathroom in the garage, this remodeled room was designed to function as a playroom, an office, a guest room and a living room. Eleven-year-old John states, “This is my room — the guy cave” The Hibbs bought the charcoal drawing over the green loungers at an auction.

Sarah Greenman

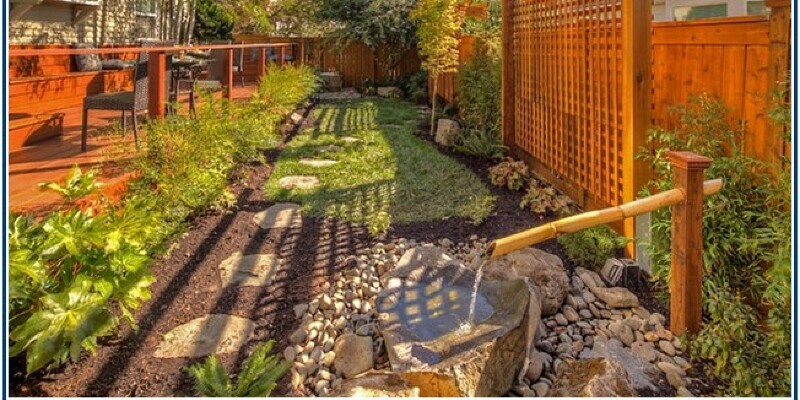
Ju-Nel homes are commonly constructed on oddly shaped, heavily wooded lots and located around a tree. Rick designed and constructed the pool, spa and deck at 2011. The garden has low-voltage landscape lighting plus a lawn made of artificial turf.

Sarah Greenman

Sliding doors off the living room open into a broad deck and steps that lead down to the spa and pool. “My dad is a lawyer, and all I could see was that the liability issue,” Susan says of the pool. “But ultimately it’s been great for our family.”

Sarah Greenman

The deck also boasts an outdoor kitchen with a built-in stainless steel Jenn-Air gas grill, refrigerator and sink. Outdoor-rated ceiling fans, two ceiling-mounted gas patio heaters along with also a remote-controlled mosquito misting system keep the family comfortable during Dallas’ hot summers and cold winters.

“I love how our house enhances our experiences with our family and friends, how it accommodates our little household and 60 people because of my parents’ 50th-anniversary celebration,” Rick says.

Sarah Greenman

Rick recently constructed and constructed a pool theater with surround audio. (Susan lounges here with boy Wesley, while John swims near Rick.) “Our proudest times are if we have family parties for vacations, or family and friends come over to watch a soccer match, or celebrate birthdays,” says Rick. “The home simply works for anything is occurring.”

See additional photos of this Ju-Nel house | Watch another Ju-Nel home

Show us your home

Read more homes by style:
Small Homes | Colorful Homes | Eclectic Homes | Modern Homes | Contemporary Homes
Midcentury Homes | Ranch Homes | Conventional Homes | Barn Homes | Townhouses | Apartments | Lofts | Vacation Homes

See related

Warm Minimalism at Pittsburgh

For Julia Reynolds and first-time homeowners Chuck, decorating their home was really a lesson in editing. Chuck, an electronic strategy consultant, and Julia, the owner of a home decor boutique, desired a clean, minimalist and mostly monochromatic look for their Pittsburgh home. They admit to some meticulous design procedure — which occasionally led to lengthy email exchanges about a single purchase — but the outcome is a carefully curated and stylishly customized residence.

in a Glance
Who lives here: Chuck and Julia Reynolds and their dog, Jake
Location: East Liberty neighborhood of Pittsburgh
Size: 2,150 square feet; 3 bedrooms, 11/2 bathrooms
Year constructed: 2009

Jason Snyder

The couple’s foreclosed home is just one of six in their neighborhood constructed in 2009 by East Liberty Development and designed by Pfaffmann + Associates.

The homeowners installed a modern slatted wood screen to enclose their courtyard and guarantee a modicum of solitude from the street.

Jason Snyder

The large and inviting front porch is a nod to the type of the older homes in the neighborhood, but is rendered here in concrete rather than wood.

Parts of the outside are clad in a composite siding made from recycled wood.

Jason Snyder

The couple’s living room is kept minimalist, with accessories and pillows from Julia’s store, The Shop in East Liberty. The doors behind the sectional connect to the central courtyard and the kitchen outside that.

Flanking the doors are framed photographs taken by Chuck’s brother. Chuck grew up with a darkroom in his family’s basement, so that he shares an appreciation for photography with his sibling.

Sectional: Double Pebble, CB2; java table: Origami, West Elm

Jason Snyder

The black and white art in the entrance sets the tone for the couple’s minimalist aesthetic. Julia made the “Liberty” printing.

Artwork: Stephen Tuomala (left), “Tribe” by Gregory Beauchamp (correct)

Jason Snyder

Julia made this accent wall in the guest bathroom, which has been inspired by a Marimekko wallpaper pattern. She first produced a grid of sponge-applied paint, then used a brush to paint around every world to blur the edges. The DIY job took about a week to finish.

Towel: Hammam, West Elm

Jason Snyder

For Chuck and Julia, one of the numerous selling points of this house was all of the natural light, especially in the spacious dining room and kitchen. Contractor Chris Rhodes made the black-stained concrete countertop in kitchen.

Dining table: CB2; seats, bar stools, pendant lights: Ikea

Jason Snyder

The smallest of these 3 bedrooms serves as a shared residence office. The sleeper sofa comes in handy when family and friends trip from Washington, D.C., the couple’s hometown. The picture throw pillow was made by Nell & Mary — one of Julia’s favourite designers from her shop.

Sofa: Kivik, Ikea; wall sconces: Aläng, Ikea

Jason Snyder

The couple worked with local craftsman Colin Carrier of London Pattern to design and make this steel bookshelf. The bookends are magnetic and can be reconfigured in any arrangement.

Jason Snyder

The Reynoldses designed and made this headboard in the guest bedroom. The knotty pine was sourced from a local hardware store and has been bolted to the wall. The little built-in side table is encouraged by L-brackets.

Jason Snyder

Julia and Chuck hang in their courtyard with their mixed-breed dog, Jake. The couple enjoys fun in this area, and Julia wanted to make sure it was nicely lit irrespective of the time of day. She strategically hung outside string lights in a zigzag pattern to make an intimate gathering room at nighttime.

Outdoor sectional: CB2; exterior lights: Amazon

Show us your home!

Read more homes by style:
Small Homes | Colorful Homes |Eclectic Homes | Modern Homes |Contemporary Homes
Midcentury Homes | Ranch Homes | Conventional Homes | Barn Homes
Townhouses | Apartments | Lofts |Holiday Homes

More: How to Decorate When You’re Starting Out or Starting Over

See related

10 Ideas for Summery Dining Room Decor

This summer, craving a fresh look for your dining area? Look at these 10 ways to spruce up your space, from quick tablescape ideas and simple DIYs to more ambitious weekend DIY jobs.

1. Cover a wall with a garden trellis. Insert a backyard party vibe into your dining room by employing a trellis, cut to match, to a couple of walls. Finish the look. Behind the trellis, hang a mirror for an elegant twist.

A Beach Cottage

2. Set a beach-inspired table. Accent simple white dinnerware with aqua goblets, woven chargers and block-printed napkins tied with twine. Rope-wrapped buoys and a cluster of pretty bottles in the center of the table are ornamental, and you can fill the glass bottles with water or lemonade.

Sam Van Fleet Photography

3. Create wall art that is quick. Have a sea-inspired coffee table book that you enjoy? Enlarge a couple of pages and print them in black and white for almost instant wall decoration. Simple white or black frames are all you will need — you can finish this project in one morning.

Madison Modern Home

4. Paint a basic table with chalkboard paint. For this particular project from Madison Modern Home, a budget-friendly Ikea table has been coated with chalkboard paint, transforming it into a writable surface perfect for wine and cheese parties. Have little ones at home? A chalkboard table could help keep small hands occupied after dinner, too.

How to Create Your own chalkboard paint

Dreamy Whites

5. Bring a corner to life using a ladder display. Prop a ladder up and lineup the rungs having an assortment of colorful vintage bottles. Fill some with flowers or trim branches, and leave others empty to grab the light. Do not wish to use bottles? Shop and display pretty table linens onto the rungs instead.

Highgate House

6. Beachfront finds. Collect seashells, beach glass or driftwood in a shallow woven basket or tray to get a simple, chic centerpiece that may be inserted to all summer long. Found a great larger piece of driftwood? After cleaning it (you do not want bugs on the table!) Set in the table’s center and encircle it.

LIV Showroom

7. Embellish a mild. Wrap the arms of a plain chandelier using rope to get a nautically inspired DIY makeover. Insert additional textural accents, like a woven basket and natural-fiber rug, to complete the appearance.

Gosto lifestyle & design

8. Try out a tablecloth or even runner. Give your dining space an airy appearance by draping your table in a sheer, lacy cloth. The one shown here was made by simply cutting out a vinyl fabric available by the yard. No sewing needed!

Abodwell interior design- Brittney Fischbeck

9. Set out. Fill glass compotes or bowls using a small amount of sand, then place succulents or air plants indoors for a simple summertime tablescape. Woven placemats and seat slipcovers that are white increase the beachy vibe.

Kate Jackson Design

10. Craft your wall art with sea treasures. Sea lovers or shells could be mounted in frames or shadow boxes for special wall art on a budget. Use plain white paper as a background or give your art texture by wrapping the frame backing in organic sheet or burlap.

Have at it: Find all Sorts of home projects in the DIY section

See related