Get the Scoop on Dish Screen

Do you have that one plate that you never use since you can’t endure to view pasta sauce smeared all over it? Or have you eyed a fairly dish at a shop and wished you had a use for this? Rather than relegating it into the dark of your cabinet, show it off. After all, integrating plates into your decoration — whether they’re heirloom bits or mismatched vintage flea market finds — can be a playful, inexpensive way to liven up your home.

Shirley Meisels

1. Produce wall artwork. A brilliant montage of dishes is a great way to add interest and whimsy to any wall without needing to invest huge bucks. It’s possible to locate plate hangers at most craft and home shops.

Step-by-Step: How to Hang Plates

Shirley Meisels

Tired of fundamental paintings or artwork prints over the couch? Start looking for musicians, for example Piero Fornasetti, who use ceramics as their moderate.

Neuhaus Design Architecture, P.C.

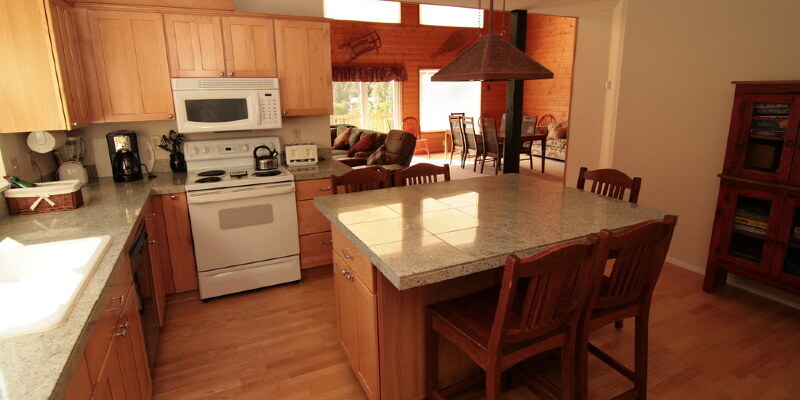
2. Show off your collection. A cube shelf along one wall is an excellent way to store and display favorite kitchenware.

3. Have fun! Pick a motif and play with this. Grouping similar plates in a variety of sizes causes an eye catching montage. Or, if you’ve plates of different colours and designs, pick similar-size ones to hang together to get a more ordered but visually intriguing appearance.

Leslie Goodwin Photography

4. Accentuate a motif. Punctuate a room by displaying corresponding plate artwork. Here, the playful arrangement of white plates on a gray wall perfectly offsets this black and white dining area. Why don’t you display white and blue china within an Asian-theme space or Talavera plates at a Spanish colonial revival house?

Kati Curtis Design

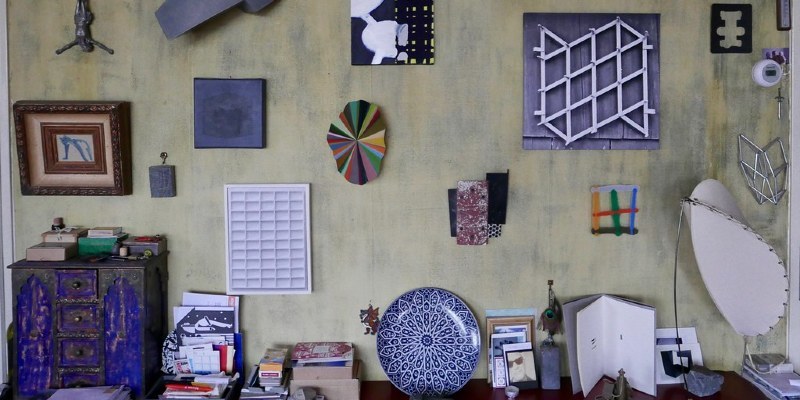
5. Fill a little space. Pep an otherwise insignificant corner of your house by closely grouping a set that incorporates a variety of shapes and dimensions.

CapeRace Cultural Adventures

6. Ditch the cabinets. Allow your taste in kitchenware to glow by adopting open shelving. Neat piles and artful arrangements would be the trick to fairly screens.

Beach Vintage

7. Rack them up. An open cottage-style plate rack is a great space saver which also permits you to showcase your collection. While a monochromatic set of dishes will achieve a clean appearance, an eclectic assortment such as the one pictured adds a welcoming pattern of colour.

Browse plate racks

TILTON FENWICK

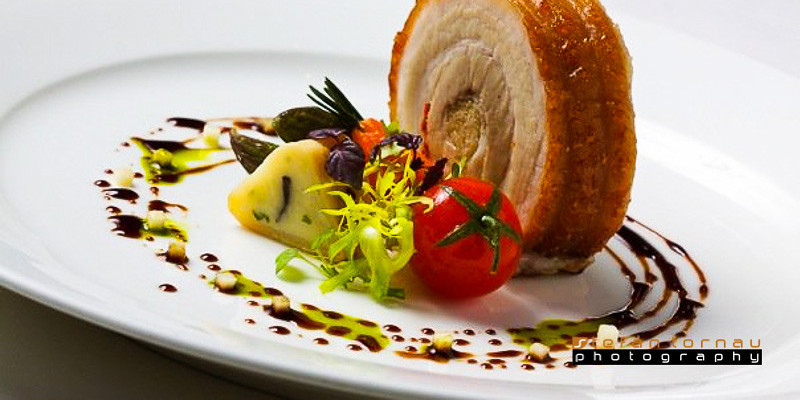
8. Create unforgettable table settings. Like the perfect fashion accessory, the right dishes can set a table off beautifully. Invest in china which will accentuate the decor of your dining area. Breathe life into a normal table setting by mixing and matching — pair your grandma’s china with modern pieces, for instance.

Artisan Books

For further inspiration, check out Shax Riegler’s stunning book Dish: 813 Colorful, Beautiful Dinner Plates (Artisan, $35).

More:
Decorating With Dishes

Create the Dining Room More Fun

Calling All Dishaholics

House Planning: How to Set Up Your Kitchen

See related

Guest Picks: Coffee Service

Since investing in a coffee press, I have been carrying my morning beverage pretty seriously. Starting off the day with a fantastic cup of coffee is absolutely worth the additional effort. Here’s a collection of my favorite coffee accessory finds from around the internet. Why not make an everyday ritual a little more special with a few pretty tools? — Kathryne from Cookie and Kate

Amazon

Bodum Chambord 8-cup French Press Coffee Maker – $53.50

I purchased the 12-cup Bodum coffee press so I could make enough for guests whenever they encounter. They state”12-cup” however, it actually makes enough for 4 to 6 cups’ worth.

UncommonGoods

Hidden Animal Mugs With Tails – $25

Would these small cups be any cuter? Each has a surprise small critter coming from the base.

UncommonGoods

Heart Coffee Scoop – $24

These fun heart coffee grinds would make a great gift for a love affair or a good friend.

West Elm

Sugar + Creamer Set on Bamboo Tray – $14

This sugar and creamer pair from West Elm comes with its own small bamboo tray for easy support. I really like the simple, modern lines of this set.

Keep Calm Gallery

Smell The Coffee Tea towels – GBP 9

Wake up and smell the coffee! This is an enjoyable tea towel to get a coffee enthusiast.

Alessi

hot.it, Electric Kettle

Electric kettles heat up water super quickly for tea, coffee, oatmeal and more. This modern, stainless steel electric kettle is actually slick.

Amazon

Krups Electric Coffee and Spice Grinder with Stainless-Steel Blades – $24

I have been meaning to buy a coffee grinder for grinding freshly roasted coffee beans in the home. You can also use it for grinding spices. This one is cheap and highly rated.

A+R

Pantone Bone China Mug Set – $78

These Pantone mugs are minimal and pretty. They are a fantastic gift for a graphic designer or colour fan!

Micro porcelain spoons set of three – $1.95

I love these little porcelain spoons. They’re perfect for stirring cream into coffee and serving little scoops of a dip.

Amazon

Jonathan Adler Carnaby Talitha Tray – $68

I love this patterned tray by Jonathan Adler. It’s little and seems just the right size for serving a few of cups of coffee.

Amazon

Jonathan Adler Utopia Elephant Mug Cup – $30

I might need to give these fitting Jonathan Adler elephant Presents as a marriage gift this summer. They’d be perfect for the quirky couple.

Golden Calf

Ceramic French Press – $35

I’d happily leave one of these colorful French presses out on my kitchen countertop daily long.

Double Coffee Measuring Spoon – $5.95

This sleek, easy and affordable coffee scoop from Crate and Barrel makes measuring coffee a cinch.

Crate&Barrel

Bodum® Pavina Tumbler – $9.95

This double-walled glass mug by Bodum is like magic: The contents remain hot and the exterior stays cool.

Merchant No. 4

Merchant no. 4 – Honey Jar + Stick – All

This beautiful honey jar would be ideal for drizzling honey to coffee. I love the acacia wood and clean layout.

Amazon

Bodum Double-Wall Stainless Steel Travel Coffee and Tea Press – $40

This journey coffee press is neat. Brew your coffee directly in the mug and move!

Amazon

KitchenAid Gourmet Essentials 2-Quart Tea Kettle, Stainless Steel – $80

I made the mistake of buying a super-cheap teakettle, and I think I’ll need to update to the KitchenAid kettle shortly. I really like the brushed metal outside.

CB2

Bright round marble top coffee table – $349

Great coffee deserves a fantastic coffee table. This little, round marble-top table is beautiful. The photographer in me can’t help but think it would would make a lovely background for food and beverage photos.

Williams-Sonoma

Chemex 6-Cup Glass Coffee Maker – $36

The Chemex coffeemaker appears to be getting quite a lot of focus recently. I am perfectly happy with my coffee press, but the Chemex is an alternative that allegedly yields a full-flavored, clean-tasting brew.

Crate&Barrel

Thermal Mirror Carafe – $39.95

I usually drink freshly brewed coffee right away, but this pretty thermal carafe are able to keep drinks hot for hours.

Next: You’re Invited to High Tea

See related

Handmade Home: Construct a Simple Flower Box

This DIY blossom box adds charm and curb appeal. And once you’ve obtained the basic steps down, you can easily personalize yours by producing your own mounts, including decorative molding, angling the endings of the box, creating a curved edge or adding any other unique details that make it feel like your own.

Materials:

1-by-8-by-10-foot plank in #2 pine (that is what I used)
Pair of saw horses (I used two old chairs)
Tape step, T square and hammer
Drill with large bit
Nails (I used #6 penny-finish nails)
Circular or hand saw
Primer, paint and brushes
Metal or wood mounts (available at home improvement stores)

Step by Step

1. Measure your window and then decide the period of your flower box. Mine was 30 inches. Measure and mark with a pencil.

This tier pine is the least expensive, but it’s a couple of knots in the wood — with a little paint they may be camouflaged. You can always use the superior pine, but the cost for the identical size board is about three times as much.

Use the square to make sure your line is directly, and mark it in pencil.

2. Saw the line across.

The regional lumber yard or Home Depot may be able to make direct cuts for you. In case you’ve got the measurements, a pencil, tape measure and square, all you’ve got to do is make all of your markings and have someone cut the wood.

Utilize the first bit as your template to the subsequent two. You should end up with three pieces of the desired length, one for each long side and one to the floor.

3. Nail the sides. It is much simpler if you begin the nails prior to placing the pieces completely together. This way, you have to hold the pieces together only while hammering them and you do not have to worry about holding the nail in place.

The nails I used have heads. When they’re hammered in they aren’t too noticeable.

That is what you’ll have after attaching two of the boards you cut.

Do the identical thing to attach the side.

4. Together with the leftover bit, mark and measure the short end pieces.

Again, use the T to make sure the line is even. Draw your line and use the piece as a template to the other end.

5. Begin your nails as you did before and nail in every end.

6. Drill drain holes. Using a ⅜-inch drill bit, drill three holes in the base of the box for surplus water to drain out.

7. Insert finish. If desirable, prime and paint the box in the color of your choice.

Optional: If you want to Create Your own mounts, then you’ll want:
Added woodScroll sawTo create a more detailed box, then you’ll want:
RouterDecorative molding

8. Line the box with transparent plastic. Staple lining into position to prolong the life span of the box.

9. Fill out your box. Choose a loose soil, the identical type you’d use for a marijuana or alternative planter, from any home improvement store or nursery.

Susan Duane

10. Hang it! Here is my finished box. I did this project. Come spring it’ll be full of beautiful and bright blooms.

Tell us have you got a window box or a location for one? Please share a photo below.

More Handmade Home:
Revamp a Seat
Antique Castoff Emerges as Wall Art

See related

Differences Between Mammoth Dill & a Dill Bouquet

Flavorful dill (Anethum graveolens) produces edible seeds and leaves, which are used to season salad dressings, pickles and cooked meats and vegetables. Two popular types,”Bouquet” and”Mammoth,” also called”Long Island Mammoth,” have similar growing standards and do well in home gardens. Though both varieties produce flavorful seeds and leaves, they look slightly different and therefore are best-suited for different uses.

Size Replies

“Bouquet” dill generally grows to approximately 36 inches tall, even though it might reach up to 5 feet tall in optimum conditions. “Mammoth” increases to a minimum of 30 inches, but it typically tops out at 4 to 6 ft tall. Though”Mammoth” is generally the taller variety,”Bouquet” often produces larger seeds, but”Mammoth” has bigger flower umbels, or blossom clusters. The foliage of both varieties is comparable, including the thin, lacy leaves frequent to dill.

Seed Flavor

The large seed heads of the”Mammoth” variety dwarf the bigger”Bouquet” seed heads, but both are equally productive. Each of those varieties is prized because of its new use and utilize as a spice. “Bouquet” is normally grown for its use in pickling, although it can also be used as a cooking herb. The later-developing”Mammoth” is used for pickling, refreshing use and as a dried herb. “Mammoth” can create up to 1 cup of seeds per flower head, making it more productive than”Bouquet.”

Foliage Characteristics

Both”Mammoth” and”Bouquet” create ample foliage, but the leaves of”Mammoth” have a stronger taste that makes them suitable for kitchen use. Most of the taste in”Bouquet” is focused on the seeds; its leaves are not as strongly flavored but are still edible. “Huge” leaves are bright green while”Bouquet” foliage includes a blue-green cast.

Early Birds

“Mammoth” is a late bloomer in contrast to”Bouquet.” “Mammoth” requires 70 days in prime growing conditions until its very first crop while”Bouquet” seeds might be ready for harvest in as few as 55 days. Both varieties are put into the backyard in precisely the same period in late spring after the danger of frost has passed, or in late summer to get a winter crop in mild areas. Even though”Bouquet” flowers and sets seed sooner, you can begin harvesting a few leaves from”Mammoth” even before it begins to blossom.

See related

Difference Between Baby Bella Mushrooms & White Button Mushrooms

Baby bella and white button are strains of Agaricus bisporus mushrooms which look and taste otherwise. The flavor of the two is also influenced by the growing conditions and the duration of cultivation. White buttons have been harvested at an immature phase, while baby bellas are harvested an intermediate stage of adulthood. Portabella mushrooms are fully adult baby bellas.

Miniature Mushrooms

Despite their title, white buttons vary in color from white to light brown, depending on when they’re harvested. They’re tiny — less than 1/2 inch — and resemble rounded buttons with short stems. White buttons have a light flavor that becomes stronger when they’re cooked. They’re eaten raw in salads, sauteed on pizza or burgers, or cooked in chili, soups and other dishes. Approximately 90 percent of the mushrooms sold in the United States are white buttons. They’re also known as Paris mushrooms since they once were grown from the caves under the city of Paris, France.

Bigger and Browner

Baby bellas are harvested when they’ve been growing about 40 days. They’re bigger and heavier than white buttons, and vary in color from light tan to rich brown. Baby bellas possess an earthier, meatier flavorthat complements beef, wild game, vegetables and rich sauces. They could withstand high temperatures, so are suitable for roasting and baking. They’re known by a number of different names, including cremini, mini bella, baby portabella, portabellini and brown mushrooms.

Great for You

Mushrooms are 90 percent water and contain no fat. A serving of five or four white buttons contains 18 calories and 3 grams of carbohydrates, while a serving of baby bellas has 23 calories and 4 grams of carbohydrates. Mushrooms contain 18 vitamins, minerals, and antioxidant phytonutrients, including vitamin D and four distinct B vitamins. They’re high in potassium and selenium. Mushrooms may benefit your cardiovascular and immune systems, as well as fight cancer and inflammation.

Choosing and Storing

To choose the freshest mushrooms, then start looking for ones which are firm and smooth. They ought to be plump and dry, but not dried out, wrinkled or slimy. Mushrooms can be stored in a brown paper bag for a day or two. For more storage, then spread them in a glass bowl or paper sack so that they do not touch each other and cover with a moist cloth. Brush peat moss, dirt and other debris away with your fingers or a wet paper towel. They may be rinsed briefly but should not be submerged in water as they absorb water readily. Don’t freeze fresh mushrooms; rather, saute and freeze them for around a month.

See related

How to Use Soda Crystals in the Laundry

Soda crystals are a crystalline form of washing soda, an old-fashioned laundry cleaning substance that’s existed for approximately 200 decades, long before the advent of modern laundry detergents. This material contains no bleaches, phosphates or smell, so it’s an alternative for those with sensitivities to substances. Add it to a usual soap to help cut through grease and stains, or use it as a presoak for stubborn stains.

It is in the Wash

1 tablespoon of soda crystals added to a usual laundry detergent in the washing machine softens the water a bit, resulting in cleaner washed products. Soda crystals may also be used for hand-washables by dissolving 1 tablespoon of the crystals per pint of water. For best results, make sure the material is colorfast before washing.

Soda for Soaking

If the laundry question is extra dirty, requiring a presoak, soda crystals come in handy once more. Soak the materials in a mixture of 1 cup honey crystals per pint of warm water before putting in the washing machine.

See related

The way to Calculate the Cost of Chain Fence from the Foot

Chain-link fence is a great way to fence in a yard so kids and pets are kept safe from street traffic. Specifying the cost of your investment requires you to first determine just how many linear feet of fence you’re going to want, then deciding the substances needed to construct that span of fence. The cost varies depending on the materials you choose and also the spacing between articles. Once you’ve determined the items you’ll need, and their costs, then you can calculate the per-foot cost. Remember should youn’t plan to build the fence yourself, then you’ll need to add on the cost of work, also.

Measure It Up

The cost of your fence is ultimately dependent on the linear feet of fence you need. Measure where the fence line will run to ascertain how much fence material you’ll buy. Once you’ve got this, then you have to decide if you would like galvanized fence or vinyl-coated fence. Vinyl-coated fence costs almost double the cost as the galvanized type. You also wish to consider the height of the fence. Chain-link fence comes in heights ranging from 3 to 12 feet. The taller the fence, the more expensive it’s going to be. You also need fittings to attach the fence to the posts.

Figure In Gates

If you plan to set up lanes, determine how many and what each will be utilized for. If you have to push your lawn mower with a 42-inch deck by means of a gate, then you’ll need to install a double gate. A single gate will do the job for walking in and from the region. Each gate will need at least two hinges and a latch to hold it close. Some gates may come with these included in the purchase price, but not all do.

Posts and Top Rail

Chain-link fence is held in position by posts and a leading rail. Posts are spaced 4 to 10 feet apart; width is based on the height of the fence and manufacturer’s recommendation. Line posts create a streak fence, corner posts are installed where the fence changes direction, and terminal posts are for hanging gates or finish next to a wall. You will have to pour gravel and concrete in the holes to set the posts, so factor at the cost, too. The top railing is measured in linear feet and needs sleeves to install it. And don’t forget the top caps for every article.

Calculate the Price

First calculate the sum of fence material and upper railing by taking the total linear feet measured. For this instance, we will utilize 109 feet. Then subtract the amount of windows as well as the width of each. If you plan to install one single gate 3 feet wide and a single double gate 6 feet broad, you would take 109 feet without 9 feet, equaling 100 feet of fence stuff. Figure out the cost for all fence materials and add them together to get the entire cost. Include sleeves to set up the top railing, posts, caps, gate latches, and all of fittings to set up the fence. Posts should come with fittings for attaching the fence, but if they don’t, add that cost in also. Take the entire cost of all materials, like the gates, and split by 109 feet to locate cost per foot. If the entire cost for all materials is $500, for instance, the cost per foot will be $4.59.

See related

What sort of Citrus Tree Has Thorns?

Several fruit trees, such as various kinds of citrus fruit which flourish in U.S. Department of Agriculture plant hardiness zones 9 through 11, have thorns on their divisions. The thorns will be the tree’s way of protecting itself against starving animals that are looking to nibble on the leaves and fruit of the tree, that may heavily damage or even destroy a young tree. With the years, as the tree grows older and stronger — and much better able to take care of creature damage — the thorns generally diminish.

Lemon

Lemon (Citrus limon) is the top acidic citrus fruit, according to Purdue University Agriculture. Desirable for its distinctive odor and taste, it is cultivated in tropical and subtropical climates around the world. Most accurate, or species, lemon trees possess sharp thorns lining the invading. Several hybrid varieties, however, are almost thornless, like “Eureka,” that is a top cultivar in California.

Orange

Oranges (Citrus sinensis) are loved around the world for their attractive package and sweet taste, though some are much sweeter than others. With the years, growers have bred oranges to be less thorny. Today, most varieties are thornless or possess thin, dull, elastic thorns found just at the base of their leaves. Oranges which are bitter and never commonly consumed, however, may have big thorns. The hardy or trifoliate orange tree, as an instance, features sharp, 2-inch extended thorns and sour fruit.

Lime

Limes (Citrus aurantifolia) are used in everything from cooking to adding fragrance to cleansers and other industrial products. They’re the 2nd most popular acidic citrus fruit — secondly to lemons — and will also be less cold-hardy than lemons. Although lime trees, using their small, stocky profile along with thorny branches, look somewhat tough, the fruit is in fact sensitive to coldtemperatures. Most commercially valuable lime trees do possess small thorns, and even though thornless varieties are more desirable, they are less productive, according to Texas A&M; Aggie Horticulture. The Mexican lime, or the important lime, is probably the most well-known of the varieties.

Grapefruit

Grapefruit (Citrus X paradisi) trees, such as other citrus trees, have thorns, but they’re short and flexible, and they’re only found on the twigs. “Marsh” is the most popular variety grown in the United States and is desirable for its sweet, juicy flesh and small amount of seeds.

Kumquats

Kumquats (Fortunella spp.) , included in the Citrus genus until 1915 when they were reclassified to the Fortunella genus, are prized for their sweet and tart flavor — the thin, creamy skin is sweet, but the pulp is tart. Kumquats are all about the size of plums, with skin which range from bright orange to ruby red, and are generally eaten whole. The trees are small, compact and slow-growing. Many, like “Hong Kong,” are liberally covered with thorns. A few others, like the popular “Meiwa,” are thornless or feature small — but still sturdy — spines.

See related

How to Measure What Size Round Table Will Fit in a Room

A round table is an efficient use of a room’s real estate. More people can be adapted around a round table than around a square or rectangular table. Use the method a decorator uses that will help you figure out the maximum size of table your room can hold and still be usable. Follow up with the improvement of the number of seats the table can adapt comfortably for a complete table-planning project.

Measure the width and length of this room. Draw a floor plan representation of this room on scale graph paper, with a scale of 1 square into equal 6 inches. As an example, if the chamber measures 16 feet by 12 feet, draw a room outline 32 squares by 24 squares.

Measure the width and place of the doors in the room. Indicate them on the graph paper using a break from the wall line equivalent to the position and width of the doorway. If the door opens into the room, then draw the place occupied by the door swing on the graph paper. The door swing signals the amount of space the doorway occupies since it opens. Pull the door swing for a half circle, the radius of this circle equal to the width of the doorway, the center of the diameter line aligning into the hinge side of the door.

Indicate the fireplace, if present, and any heat registers or ac units present in the room onto the floor plan. Indicate any furniture is to remain in the room, like a sideboard or buffet and hutch or sliding cabinet doors.

Draw a line around the floorplan, 36 inches from all of the obstacles, indicating the most distance to get a table. This is the place available to adapt the table and seats. (A seat requires a minimum of 36 inches from the edge of the table for simplicity of operation. Thirty-six inches equates to 6 squares on the floorplan.)

Gauge the narrowest distance on the floorplan from side to side in maximum distance available. This is the maximum-diameter table that can easily fit in the room and allow proper seat manipulation around the table.

Multiply the width of the table by 3.14 and divide the result by 24 inches to the number of seats that can fit comfortably around the table. As an example, if the width of the table is 60 inches, then the table can comfortably accommodate eight or seven people.

See related

How to Repel Pest Animals in a Yard

Animal pests introduce quite a quandary into the eco, wildlife-loving homeowner striving to keep a manicured, well-maintained lawn. Yards commonly contain the requirements for several common pest animals’ survival, mainly food, water and shelter. Unfortunately, the most effective and fastest way of preventing animals from damaging a yard and all included therein is extermination. So maintaining a balance of humaneness with efficacy is vital when repelling these invaders. Short of dispatching, the easiest approaches to deter pest animals — like rabbits, gophers and the dreaded skunk — is having a hurdle, especially about garden areas, or with organic repellents, like predator urine.

Natural and Environmental Repellents

Move all food water and supplies, like pet dishes, bird feeders and rubbish cans, inside at nightfall to discourage raccoons. If you must maintain the rubbish cans out, then fit them together with secure lids. Distribute a light dusting of cayenne pepper, baby powder or blood meal on vegetables and corn ears to serve as a natural raccoon repellent, and prune any limbs from trees hanging above the perimeter of your yard with lopping or pruning shears to prevent access.

Remove and discard piles of stumps, collected timber, tall grass and mounds of brush to discourage woodchucks and rabbits. Applying dried bovine blood, hot-pepper (capsicum) spray, talcum powder and puppy pee around the perimeter of your yard also repels woodchucks. If you have a gopher issue, place used cat litter, pine oil or rags covered in cat or dog pee in their burrowing holes.

Drape bird netting over fruit trees along with fruit-bearing plants which attract birds and wrap it around the base of the plants or trees. Secure the ends of the netting with the plastic retaining clips provided with the netting. Put strips of reflective tape to goal trees, hang reflective, disposable pie tins in their divisions or tie large, “frighten” balloons with pictures of hunters’ eyes on them into the limbs to repel birds from your yard.

Slim back overgrown shrubs and bushes, stack any firewood piles tightly and remove any fallen fruit from the yard to deter skunks from penetrating. Like repelling raccoons, eliminate any potential food sources and transfer or place tight-fitting lids on rubbish cans.

Fencing

Assess the perimeter of your yard or garden in feet with a tape measure and mark the corners with a spray of landscaping paint. Add the dimensions to find out the length in feet of chicken-wire fencing you need.

Divide the length of fencing you’ll need by five to arrive at the number of chicken-wire bets required. If the length of your yard’s perimeter is not divisible by five evenly, round up the span until it’s.

Drive a timber stake in every corner of your yard’s perimeter with a hammer and tie a piece of twine between them to serve as a guide for placing the fence bets. Tie the twine so that it rests against or near the ground.

Make two marks, 3 feet apart, with landscaping paint on the twine at which you will place the gate. Mark the remainder of the twine with the landscaping paint at 5-foot intervals to serve as a manual for the span between bets.

Dig a 1-foot-deep and 2-inch-wide trench about 1 inch behind the twine employing a garden trowel or scoop shovel. Reserve the dirt to backfill the trench later.

Hammer one 5-foot-long chicken-wire stake in each of the corners of the trench that runs along the perimeter to a depth of 1 foot with a short-handled sledgehammer. Make sure that the clips that fasten the poultry netting into the bets face the inside of the yard.

Hammer the remaining bets 1 foot deep in the trench at the places marked on the twine. Remove the wood manual bets and the twine.

Unroll the roster of poultry netting and place it in the trench before one of their corner stakes. Secure the netting into the stake by first prying open the ground-level hook having a flat-head screwdriver, inserting the connection between it and the stake and closing the hook by splitting it shut. Open another hook to the stake above the first, insert the connection between it and the stake and hammer it closed. Keep securing the netting into the wager. Attach the netting to each stake around the perimeter, pulling it taut before securing.

Cut 1 foot in the bottom of a 3-foot-long portion of the stick with cable snips once you reach the very first stake utilized to your opening. Reducing the netting 1 foot shorter prevents it from going from the trench and allows you to use it in order to enter and leave. The top of the 3-foot-long portion used as the opening will nonetheless be with the remainder of the fence.

Cut the mesh in the roster together with the wire snips and loop one part of tie wire at the top and one piece at the bottom of the netting attached to the wager. Twist the tie wire to fasten it into the netting.

Loop the other ends of the tie wires into the netting linked to the other stake and twist them to fasten. Untwist the two tie wires when you need to go into the fenced area. Finish by backfilling the trench with the reserved dirt and tamping it down with your foot.

See related

Grading Tile

The Porcelain Enamel Institute has created a standardized grading system for ceramic and porcelain tile. The PEI rating categorizes tile by its specific intended use and its capacity to resist wear from foot traffic. The ratings are recorded on the packing of all tile makers. Selecting the proper tile level for any specific application is simplified as a result of this rating system. The PEI rating does not consider price, and every level of tile is priced differently due to the manufacturing processes. Tile with a higher score is more expensive to make and will cost the customer more.

Group 1

This type of tile is intended for quite light residential usage. It won’t hold up to foot traffic, and should be used on walls only. Don’t use this kind of tile to get a floor or countertop application; it will fail in a short period of time. Tile with this rating is offered in many different sizes, configurations, finishes and colours.

Group Two

Group 2 Bath is just a residential-rated, low-to-medium usage tile. Other than very high traffic places, such as entryways, kitchen floors and counters, this tile could be used for a variety of applications in the home, such as bedrooms, bathrooms and walls. Group 2 tile is also offered in various sizes, finishes and colours.

Group 3

Designed to resist medium to heavy wear, group 3 tile is rated to be used in residential and light commercial applications. Group 3 tile is noticeably thicker and heavier than group 1 or 2 tile. It can be utilized in any residential application and is ideal for countertops. Certain light commercial applications are also suitable for collection 3 tile, including low-to-medium commercial traffic places like reception places, small shops and little restaurant dining rooms. Group 3 tile has the biggest range of sizes, colours and finishes of each the tile ratings.

Group 4

Designed for medium commercial to light institutional software, group 4 tile is significantly heavier and more durable than lesser graded tiles. It is rated for use in restaurants, offices, hotels, banks and hospital lobbies. Group 4 tile can be found in fewer alternatives than lower-rated tile because of its higher manufacturing price.

Group 5

Group 5 tile is designed for areas that experience exceptionally heavy foot traffic. It is rated for exterior uses where public safety is paramount. Resisting extreme wear, the elements and fever, group 5 tile is ideal for shopping malls, public building entrances, high-rise entrances and indoor or outdoor public swimming pools. Group 5 tile is quite heavy and thick, and additionally, it tends to be the priciest tile compared to lesser-rated tiles. Group 5 tile is also produced with fewer alternatives in size, texture and color.

See related

How to Find the Right Plants for Your Yard

A gorgeous landscape adds aesthetic value to your home. If planned correctly, it can also add precious outdoor living room. If you do not select the correct plants for your lawn, however, that beauty can come at a price: You’ll need to work overtime to keep your plants healthy and thriving. No matter how appealing or desirable the plant, if it wo not grow well in your lawn, it is not a good choice. Instead, plan carefully, and find plants which grow best in your climate and place.

Determine your U.S. Department of Agriculture plant hardiness zones, which are defined by average low and high temperatures. Select only those plants recommended for your growing zones to ensure that they won’t be damaged by frost or heat. If you do not understand your USDA zones, look up an online interactive map, or check with someone at your local garden center.

Look carefully at your lawn. Be mindful of how much sunlight or shade covers the home. Look for electricity lines or other obstructions, like underground pipes, which may interfere with plant growth. Pick planting locations that get no less than a half-day of sunlight and do not have obstructions. Be aware of any hard areas like the ones with complete shade or very dry soil, so which it is possible to select plants that thrive in such circumstances. To locate these technical plants, then bring your notes into the garden center, and receive advice from its pros.

Select plants that fit the purpose of your lawn. If you’re trying to add curb appeal to your front yard, you may wish to select plants which bloom during the growing season. If it’s shade you’re after, start looking for a fast-growing shade tree. If you would like to stabilize a hill and protect against erosion, start looking for plants or vines which are frequently utilized for ground cover. Again, ask for assistance at your local garden or horticulture facility. Many universities have horticulture centres which are totally free to the general public.

Test the soil. Some soils are very acidic, while some are very alkaline. Plants often do much better in one kind of soil over the other. Soil testing kits are available at many retail garden centres. Choose plants that fit the kind of soil you have in your lawn for best results.

Look at your neighbors’ yards. Should you find a landscape that is especially attractive, consider asking your neighbor for hints as to what you can plant in your yard. If you are very lucky, your neighbor may be delighted to provide you with cuttings from the own plants at no cost.

See related

The way to Set Up a Mediterranean Buffet Table

The Mediterranean diet is not just healthy and sumptuous; the principal components of its own cuisine are magnificent when laid out on a buffet table. Mediterranean food is vibrant, welcoming and fresh. In addition, it lends itself nicely to your buffet because so many recipes arrive in bite-sized morsels. Provide a wide array of flavors, flavors and scents, and don’t forget to mix hot dishes with cold.

Linens and Utensils

Mediterranean colours tend to be wealthy and natural: terra-cotta, olive green, eggplant purple, wealthy bougainvillea red, and the creamy white of gardenias. Search for tablecloths and napkins that reflect these colours. Serving pieces should be made from thick, painted pottery and heavy glass. Utensils should be hardy rather than delicate to keep in keeping with the earthy charm of the motif. Roll utensils in cloth napkins and place them at the end of the buffet so your guests don’t have to juggle them as they pick from the heals you’ve set out.

Side Dishes

Among the hallmarks of the Mediterranean way of eating is that red meat is not the main course. Set out bowls and plates at the beginning of the buffet, but put the grains and vegetables next instead of the meat. Mix the earthy colours and different textures of brown-rice risotto and gnocchi with braised fennel, asparagus, spinach, sweet potatoes, eggplant roulades and other vegetable dishes in platters with serving utensils put in every one.

Main Dishes

Fish and shellfish are the basic proteins of the Mediterranean diet, so take advantage of each of the different ways they may be cooked. Offer grilled scallops and shrimp on skewers, tender cod rolled around new braised leeks, and salmon poached in lemon and wine. Offer paper-thin pieces of broiled steak together with braised chicken pieces for guests that are less daring concerning seafood.

Condiments

Put a olive oil, red wine vinegar and balsamic vinegar in glass cruets. Provide bowls of chopped nuts, freshly grated parmigiana cheese, crumbled feta cheese, and grinders with sea salt and mixed peppercorns. Toss several varieties of olives together and put them with the condiments, together with a generous bowl of Greek yogurt spiced with lemon juice and dill. Put napkin-lined baskets of thick artisan bread studded with garlic or cedar, and split into hefty balls for dipping into sauces one of the condiments.

Desserts

Fresh fruit is a staple of Mediterranean cuisine. Arrange bright pottery bowls of grapes, pomegranates, apples, bananas, and especially luscious figs for guests. Scatter small platters of baklava, biscotti, flan and tiramisu one of the bowls of fresh fruit for a special treat. Remember that the cappuccino, espresso and dessert liqueurs.

See related

The best way to Color Pavers

Concrete pavers are frequently the most practical and economical way to produce a backyard patio, driveway or walkway. Although those inexpensive gray pavers in the home improvement center may leave something to be desired, it is possible to alter the concrete’s shade without professional intervention. Acid stain — a combination of metallic salts, hydrochloric acid and water — is a cheap, safe method which may be carried out in a single afternoon. The stain absorbs into the concrete’s pores and also is available at home improvement stores in a variety of colors. Clean out the pavers correctly and protect yourself in the etching chemicals to make concrete pavers your neighbors will envy.

Spread a tarp in a well-ventilated area, preferable outdoors. Lay down the clean and scoop each one with a combination of warm water and a mild detergent. Work the soapy mixture into the pavers with a plastic bristled scrub brush to remove any surface dirt and grease.

Wash the pavers thoroughly with a garden hose. Allow the pavers to dry for at least 24 to 48 hours prior to continuing.

Wear a set of rubber gloves and a safety mask to handle acid stain. Slowly mix 3 parts stain to 97 parts water. Stir and add more stain until you reach a 10 percent concentration of the goods.

Apply the concrete stain with a paintbrush. Start by covering the upper surface of the paver with an even coat of the merchandise before continuing onto the sides, even if the pavers will be used as edging.

Allow the pavers to dry for at least one to two hours before applying a second coat, if needed to make a more intense shade. If you are delighted with the first coat’s color, it’s not required to apply any more.

Allow the final coat to dry for at least 24 hours before placing the pavers.

See related

Different Pineapple Plants

Pineapple plants have been grown for their fruit and as ornamental plants within hot-climate landscapes. In cooler climates, they can be planted in containers and moved inside when temperatures begin to fall into the upper-50-degrees Fahrenheit range. The many varieties of pineapple plants developed for fruit are divided into four category groups. Additionally, there are hybrid pineapple plants cultivated only for ornamental purposes.

Pineapple Plant Similarities

Pineapple plants have been terrestrial bromeliads hardy in U.S. Department of Agriculture plant hardiness zones 10 to 12. They climb to a height of 2 1/2 to 5 ft and width of 3 to 4 feet with long, narrow, pointed leaves. Pineapple plants grow best in sandy soil that’s full of organic matter and drains very quickly. Full sun is preferable for fruit production, while partial shade promotes leaf.

Abacaxi Group

Abacaxi pineapple plants are most commonly developed in the Bahamas, Brazil and Florida. Pineapple plant varieties within this category aren’t commonly developed for commercial production because the fruit is too easily damaged. The fruit is sweet and hot, nevertheless, and easily harvested. Mature pineapples created by plants in this category generally weigh between two and 11 lbs. The “Sugarloaf” variety produces smaller pineapples that weigh between 1 1/2 and 3 lbs. Abacaxi pineapple plants have blue-green foliage and are disease-resistant.

Queen Group

Queen pineapple plants chiefly grow in Australia, the Philippines and South Africa. Pineapple plants within this category are smaller and produce smaller fruit that weighs between 1 and 6 lbs. The fruit is juicy and delicious but tends to be cone-shaped, which causes excessive waste if this variety is utilized for commercial canning. It will not keep well, and can be harvested for sale as fresh fruit. The leaf on these plants tends to be medium green, although the “Ripley” cultivar leaves have a reddish hue.

Red Spanish Group

The Red Spanish pineapple group usually grow in Florida, Mexico, Puerto Rico, Venezuela and the West Indies. These are inclined to be larger plants using very spiny gray-green or purple-green leaf. The fruit has a rounded form and generally weighs between 3 and 6 lbs, although the “Valera Amarilla” cultivar can create fruit that weighs up to 9 lbs. The fruit has great flavor and fragrance. It’s harvested commercially for canning and fresh fruit.

Smooth Cayenne Group

Grown in hot areas across the world, Smooth Cayenne pineapple plants tend to be more susceptible to infection than other kinds. On the other hand, the leaves don’t have the spiny advantages of different types. The juicy, flavorful fruit generally weighs between two and 10 lbs. The “Giant Kew” cultivar is an unusual member of this category, with pineapples that could weigh up to 22 lbs. Most of these pineapple plant varieties have been grown commercially for canning or sale as fresh fruit.

Ornamental Pineapple Plants

Gardeners grow ornamental pineapple varieties as landscape plants or houseplants. These crops sometimes create pineapples, but the fruit isn’t generally considered delicious. Ornamental pineapple plants grow to a height of 2 to 3 feet and width of 2 to 4 feet. The leaves might have spiny or smooth edges, depending on the hybrid or cultivar. They are generally green or gray-green using pink, yellow or white stripes running lengthwise the leaves up. Ornamental pineapples bloom occasionally, creating little red or deep pink blossoms that cover a thick stem in the center of the plant. The stalk might become a small pink pineapple after the plant finishes blooming.

See related

The way to Measure for Murphy Beds

Folding beds which disappear into cupboards can offer additional space in studio apartments or permit you to use 1 space as both home office and guestroom. Classic Murphy beds split into built-in closets, but modern versions often include their very own cupboards, so you don’t need a 1920s-style dressing closet in your room to install a Murphy bed. When you step for the setup, consider its height for ceiling clearance in addition to considering the typical dimensions for a bed.

Select the size and variety of Murphy bed you would like for the space. In addition to the typical twin, double and queen sizes, decide whether you want the bed to fold vertically or horizontally and whether you want the cabinet to include storage area on the sides.

Measure the wall horizontally where you intend to install the bed. It must be at least 47 inches wide to accommodate a twin bed you intend to mount vertically or 80 inches for a side-mount twin; 62 ins for a vertical full or 80 inches for a side-mount full; or 68 ins for a vertical total or 85 inches for a side-mount full. These measurements assume that you aren’t installing cabinet space. If you are, add the width of the side cupboards to the width of the bed itself, and inspect the entire dimension against the wall.

Measure from the ground upwards if you are installing a vertical bed to make sure the ceiling is high enough. Any room ought to be tall enough for side-mount beds. For a vertical twin or full, you need at least 82 1/2 ins; for a vertical queen, you need at least 87 1/2 inches.

Check the thickness of the cupboard if you are installing the bed to one instead of building a cabinet. The cupboard must be 21 3/4 inches deep for vertical beds or 20 3/4 heavy for side-mount beds.

Measure from the wall outside to the space to be sure you have sufficient space for the bed when it’s folded down. A vertical twin or full extends 85 1/4 inches to the space; a vertical queen goes in 90 1/4 ins; a side-mount twin extends in 49 1/4 ins; a side-mount full goes in 64 1/4 ins; and a side-mount queen goes in 70 1/4 inches.

Tape the dimensions of the folded-out bed on the ground. Move the remainder of the room’s furniture in the remaining space. Confirm it all fits and you have room to wander across the bed comfortably.

Confirm that the mattress will fit through all the doors and up any stairs essential to get it in the room. Measure the height of their doors and compare it to the width and length of the mattress. Be sure you have sufficient clearance to bring the bed to where you want it.

Look at your state’s building code to find out the window conditions for a space to be legal as a sleeping room. In California, the space must have a minumum of one openable window that leads to an exit route in case of a fire. The bottom window sill must be no higher than 44 inches above the ground; if the window is completely open, the opening should be at least 24 inches tall and 20 inches broad; the net clear openable area must be at least 5.7 square feet. To compute this area, multiply the height and width of the window in inches, then divide the product by 144. Measure the window in the room to confirm that it meets these criteria or the applicable criteria in your area.

See related

The best way to Squirrel Proof that a Bird Feeder Post

Tree squirrels can be interesting to observe as they scamper up trees and over telephone lines, stopping only long enough to daringly hop over obstacles. However, for birds reliant on bird feeders, these agile mammals often spell trouble. Squirrels may seize upon bird feeders, consuming the contents and running birds from their food sources. Squirrel-proofing bird feeders on articles can be tough, but there are several ways to keep squirrels from consuming seed intended for your feathered friends.

Provide squirrels with a different feeder stocked with foods they prefer to birdseed. Fill feeders with peanuts in the shell and cracked corn, or hang dried corn cobs on trees from bird feeders.

Trim back limbs on trees which are overhanging bird feeders to stop squirrels from launching from these branches onto the feeders. Eliminate anything which could function as a launching pad within approximately ten feet of the feeder or relocate your feeder from structures and trees.

Attach an 18-inch-diameter squirrel baffle — accessible garden centres — 2 feet below each of your bird feeders by snapping it around the pole so the opening is facing the bird feeder. Insert a moveable sleeve into the pole 6 to 8 feet above the ground to prevent squirrels from climbing.

Add a few tablespoons of cayenne pepper or red pepper seeds into the feeder to further discourage any squirrels which might have been able to outwit your obstacle course. Maintain your squirrel feeders transported to further distract these continual mammals from bird feeders.

See related

Homemade Heavy Duty Vinyl Floor Cleaner

That luxury vinyl floors is a stunning addition to your home, but maintenance can be a challenge. **Vinyl which endures heavy traffic requires an equally strong cleaning regimen** to store it looking bright and new. When a straightforward wet-mop will not cut it, then try specific routines to get a heavy-duty clean which will not dismay your environmentally aware side.

Practice Prevention

Place doormats at every entrance to your home, and ask guests to remove their shoes when they enter. **Sweep your vinyl floors at least once every day** to help remove debris before it becomes ground in. Wipe up any spills as soon as they occur, and put floor protectors beneath the legs of heavy chairs, sofas or tables which break in your delicate vinyl floors. Outfit kitchen chair legs with soft, felt covers to avoid their scuffing or scratching your flooring.

Concoct a Combo Cleaner

Based on [Bob Vila](http://www.bobvila.com/articles/how-to-clean-vinyl-flooring/#.VOJxY\_nF-oo), a simple and efficient means to remove heavy dirt and dirt from vinyl flooring comprises combining a solution of **1 cup distilled white vinegar and several drops of dishwashing detergent with 1 gallon of warm water**. Mop it on, rub it off and allow it to dry completely. This solution is acidic enough to loosen stuck-on dirt, yet gentle enough to maintain your floor’s factory finish. Add several drops of essentials oils or baby oil for fragrance and also raised sheen.

Tackle Various Stains

**Spray lubricants** such as the type you use in your garage to silence squeaky vehicle doors or loosen lug nuts may eliminate stubborn scratches on plastic. Simply spray some on a soft cloth, and buff the scuffed area soundly. For tenacious kitchen spills such as fruit juice or ketchup, use a glue made of **baking soda and water**. **Isopropyl alcohol** works on ink stains, and **mineral oil** eliminates crayon. Using these common household ingredients on event helps to keep your vinyl floors sparkling clean.

Never Use on Vinyl

Never use **abrasive scrubbing brushes** on vinyl floors as it will leave disfiguring scratches behind. Also take care to avoid using any cleaners that contain **ammonia** since they can damage your finish. Certain **commercial pastes, waxes and cleaners** can leave behind filmy buildups which are nearly impossible to eliminate also. They will leave your shiny luxury plastic seeming dull and distressed. If you resort to commercial cleaners, ensure they are safe for the type of flooring you’re tackling.

See related

How to Remove Dead Dry Leaves on a Calathea Makoyana

Though some call it cathedral windows and some call it the peacock plant, there’s little chance of anybody calling Calathea makoyana dull. Translucent, creamy-green foliage patterned using a darker, intricate leaves-within-leaves design gives the plant its own rose-window splendor. As if which weren’t enough, the design repeats in pinkish-purple on the leaf’s undersides. Regrettably, like the leaves of this poet Robert Frost once observed, “Nothing gold can stay,” cathedral windows’ foliage dries out and dies as it ages. Cultural problems have a similar effect. Removing the damaged or tired leaves and supplying the right growing conditions promotes vibrant new growth.

Eliminating the Leaves

Eliminate the old, dead or dry leaves from your cathedral windows once they occur. Use clean, sharp scissors to cut them away in the base of their reddish stems. To avoid spreading insects or disease, dip the scissor blades in a solution of 1 part household bleach to 9 parts water between cuts.

Examine the remaining leaves for dead, brown tips or margins resulting from cultural problems. If you’re able to, trim the dead tissue without ruining the leaves’ appearance. Otherwise, remove the entire leaves, again disinfecting your scissors between cuts.

Determine which of the cultural practices are liable for the damaged leaves. In the wild, cathedral windows grows only in the hot, humid jungles of eastern Brazil. It tolerates outside life in U.S. Department of Agriculture plant hardiness zones 11 through 12, but does not succeed outside in colder areas without substantial pampering, though it might be grown as a houseplant.

Preventing Future Problems

Give cathedral windows a brightly lit location with no direct sun and a temperature consistently between 70 and 85 degrees Fahrenheit. Immediate sun may burn its own leaves. To keep cold air from browning and curling them, move the houseplant from air conditioning vents in summertime.

Keep the growing medium consistently moist. Lack of moisture browns and shrivels cathedral windows’ lower leaves and also causes dark, brownish spots on its upper ones. After the top 1 inch of medium is dry to the touch, water the plant thoroughly until the surplus water flows from the container’s drainage holes. Use tepid, distilled or rainwater; fluoridated water also dries the leaf tips and edges.

Provide cathedral windows using at least 60 percent humidity during winter. At lower levels, its leaves often dry and brown at the tips. Place the pot on a shallow tray full of pebbles submerged in water to just below their surfaces. Replenish the evaporating water since it raises the humidity around the plant.

Fertilize your plant every three weeks from March through September and once monthly during the rest of the year. Salt accumulation from excessive pesticide browns the leaf tips and edges. Mix 1 tsp, or the maker’s suggested amount, of granulated, 20-20-20 houseplant fertilizer in 1 gallon of water and use it to replace a normal watering session.

See related

The way to Paint My White Bathroom Vanity

Bathroom vanities are often manufactured from medium density fiberboard, but whether your white one is MDF, plywood or a different material, you may usually repaint it white or a different color without much trouble. Think about spraying the brand new paint, particularly if the vanity is MDF, because that is the very best way to generate a smooth, textureless finish. Whether you spray or brush, the bulk of the job is made up of preparation, such as disassembling the vanity, cleaning and sanding.

Obtaining the Vanity Ready

Removing everything from inside the vanity isn’t a requirement for painting it, but you’ll be able to work more readily and with less chance of contaminating your bathroom necessities should you do. Empty and remove all the drawers, and unscrew the handles. Place everything in a safe place. If you do not have room to line up the doors and drawers along the wall, then it is best to paint them in a different room. Cover the floor with plastic; tape hiding paper around the exterior of the cabinet, and you’re all set to start.

Cleaning and Scuffing

You do not need to take out the finish before painting your own vanity, but you do need to completely clean it. Use a solution of 1/2 cup trisodium phosphate per gallon of water, which will remove the flux live a bathroom fixture is very likely to collect. Rinse thoroughly with water and permit a lot of drying time speed up the drying, even if desired, by wiping the vanity down with a clean rag. TSP etches the current finish, but you should also sand the vanity by hand with 220-grit sandpaper to scuff it. This also knocks down any bumps in the old finish brought on by moisture.

Priming and Finishing

You should brush or spray a coat of primer before you paint so the new finish adheres properly without bubbling, dripping or separating. Scuff this with 220-grit sandpaper, then apply at least two coats of finish. If you spray, then each coat should be a wet coat, meaning that the surface should be glossy and even-colored when you’re finished spraying. If you decide to brush, use directly, even strokes which finish in the wet edge of the prior stroke. It’s best to start at the very top of vertical surfaces and work down; in this manner, it is possible to catch any drips as they form rather than have them appear after you’re done.

Adding the Extras

Your newly painted vanity will look its best with bright, shiny hardware. You might want to consider replacing the drawer handles and hinges, but if you soften them, it is possible to restore brass or polished brass ones by polishing them with brass cleaner and providing them a coat of protective clear lacquer. If you replace the hinges, then you’ll probably need new holes to get them. If you’ve planned ahead, you’ll have filled the old holes before painting. Drill pilot holes with an 1/8-inch drill bit, which is narrow enough to offer traction for most cabinet hinges. After carefully predrilling, rehanging the cabinet doors is a breeze.

See related

The Way To Clean Pergo Floors With Vinegar

The acidic nature of ordinary white vinegar gives it an extraordinary versatility for cleaning. Vinegar liquefied grease and hard water deposits while disinfecting, therefore it’s an effective ground cleaner. It works so long as the Pergo company recommends it for cleaning their laminate flooring solutions.

Pergo Cleaning Instructions

The cleaning instructions provided from the Pergo business call for a solution of 1 cup of vinegar per gallon of warm water. You should not simply wet-mop this solution on the ground, though. Water may cause extensive damage to Pergo flooring when it seeps in the gaps between boards and soaks into the center. Instead, wring your mop out before washing, or, for an even safer cleaning process, wipe the ground down with a well-wrung rag.

Work in Sections

To avoid water damage, it’s important to wash the ground immediately after wiping it with a vinegar solution. This is easier to do if you work in sections, washing and drying one section before continuing on to another. Drying the ground also prevents falling accidents.

See related

Which Houseplants Should Face North and South?

When you would like to add houseplants in your house, assessing the home’s light conditions is a wise place to start. Windows that face are the best locations for plants which grow well with just bright, indirect light because north-facing exposures get hardly any direct sunlight. South-facing exposures admit the best amount of direct sunlight, especially in winter, once the sun is low in the sky; so southern windows are ideal for plants that require a lot of direct light. If leafy crops’ natural light is not supplemented by artificial light from all directions, transfer the plants’ containers by one-quarter turn every two weeks so the plants will not have lopsided growth.

Foliage Varieties

Foliage houseplants with origins in shaded forest understories are suited to develop from the indirect light of north-facing windows. A good example is Boston fern (Nephrolepis exaltata “Bostoniensis”), among the most common indoor ferns. Boston fern is hardy at U.S. Department of Agriculture plant hardiness zones 10 through 12 and thrives with the added humidity provided when its bud’s bottom sets in addition to seams which line a tray full of water; do not enable the pot’s bottom to be moist. Coleus (Solenostemon scutellarioides, USDA zones 10 through 11) is an example of a leaf plant suitable for a southern window exposure because it needs sunlight for the best color development in its own leaves. Pick from its many cultivarsthat have distinct color combinations. When growing outdoors in the ground, coleus can become invasive in certain locations; develop it in a container to stop its spread.

Succulents

A number of succulent plants grow well before south-facing windows, plus they include the vibrant echeverias (Echeveria spp., USDA zones 8 through 11). Many showy echeveria hybrids with red, pink, blue, purple or orange leaves can be found; they need direct sunlight exposure in winter to come up with the strongest colors. Echeverias require less sunlight in summer, and the hours of direct sunlight in a south window are fewer in summer because the sun is high in the skies. To get a north window, then try the succulent snake plant (Sansevieria spp.) , which grows well in indirect light. A number of species can be found as houseplants, all with leathery, stiff leaves. Dwarf snake plant (Sansevieria trifasciata “Hahnii,” USDA zones 9b through 11) includes a rosette of banded, green and light-green leaves which are about 6 inches tall. When growing outside in a landscape, oyster snake plant can be invasive in certain situations; put in edging around the plant or develop it in a container to keep it within boundaries outside.

Options with Showy Flowers

Some plants with showy flowers need north-facing windows while others need south-facing windows. In winter, African violets (Saintpaulia spp.) Do well in southern windows, where they get direct light. In summer, move them into an eastern exposure, nevertheless. African violets generally are hardy in only USDA zone 11, but the species Saintpaulia ionantha is hardy in USDA zones 11 through 12. A large collection of cultivars with purple, white, blue and pink flowers are readily available. To get a north-facing place, consider peace lily (Spathiphyllum spp., USDA zones 11 through 12). Native to tropical forests, it also performs best with bright filtered light but shouldn’t get whole sunlight. Grown mostly for its leaf, peace lily features white flowers which turn green after they have been open for 10 days, and the flowers can last more than 1 month.

Tall Varieties

Valued for their size and visual effect, tall houseplants have varying demands for light exposure, based on their species. Erect plants that function as vertical accents, dracaenas (Dracaena spp., USDA zones 10b via 11) tolerate indirect light from north-facing windows. Regarding 150 dracaena species exist, offering a selection of leaf colors, such as dark green often striped with gold, cream or red coloring. The plants hit 72 inches or taller. A plant which can be grown indoors as a little tree, weeping fig (Ficus benjamina, USDA zones 10 through 12) does double duty, tolerating indirect light from a north-facing window but also doing well in a south window’s direct light. When grown as a landscaping plant, weeping fig can reach 50 feet tall but typically rises 2 to 10 feet tall as a houseplant.

See related

Differences Between Apple & Pine Seedlings

Although apple (Malus spp.) and pine (Pinus spp.) Seedlings share the identical basic functional components, their structure and arrangement are different, as are the methods that the seeds are produced. The components that the seedlings have in common are a seed coat, a seed root referred to as a radicle, and a stem called a hypocotyl. Their seed leaves vary markedly in form and number. These differences reflect the reality that pines and apples aren’t closely related. All these are seed plants, but pine is a gymnosperm and apple is a flowering plant with two seed leaves, or a dicotyledonous angiosperm.

Seed Origins

The fundamental differences between pine and apple seedlings begin with the seeds that make the seedlings. Pine seeds develop in a bract of the female pine cone, and aren’t surrounded by a fruit. Apple seeds develop within the ovary of the apple flower, enclosed with a hexagonal wall that grows into a fruit. Many pines have small winged seeds designed for wind dispersal, but about 30 of the 110 species have heavy seeds built for animals to propagate. In apples, the fruit becomes eaten and the small, hard seeds pass unharmed through an animal’s digestive tract.

Within the Seed

Both pine and apple seeds have a plant embryo that develops to the seedling. Pines have an elongate embryo in the middle of the seed surrounded by a thick layer of nutritive substance. Apple seeds are largely taken up with 2 big seed leaves and also a thin layer of nutritive endosperm, which differs in origin from the nutritive layer of pine tree seeds. The embryonic tissues that become the the radicle take up relatively little room toward the base of the seed.

Seed Germination

Germination in both pines and apples starts with the emergence of the radicle, which anchors the developing seedling and harvests nutrients and water so it can grow. In pine seedlings, the radicle splits the seed coat since it emerges, with the mineral substance surrounding the embryo supplying the energy for development. In apple seeds, then the stored nutrients in the cotyledons fuel seedling growth until plants begin to make their own food through photosynthesis. Apples and pines both require a period of moist cold in order to germinate, and also both apples and pines are hardy in U.S. Department of Agriculture plant hardiness zones 3 through 8.

Seed Leaves

The amount of seed leaves in pine seedlings varies from 2 to many, depending on the species. Ponderosa pine (Pinus ponderosa), which grows in USDA zones 4 through 8, has anywhere from six to 12 cotyledons. The cotyledons are very long, narrow and stiff, reflecting the needle-like form of their true leaves to follow. They’re arranged in a whorl around the stem of the seedling. Apple’s seed leaves are oval and fleshy-looking, arranged opposite each other at the tip of the seedling stem.

Seedling Development

True leaves emerge as the seedlings grow. In pine seedlings, needle-like true leaves appear together with the growing shoot above the cotyledons. As the tree grows, it starts to create the leaves in bundles, called fascicles, which can consist of from one to eight needles, depending on the species. In apples, elongated oval true leaves with jagged edges emerge as the apical shoot grows from between the two cotyledons.

See related

Can Worms Eat Coffee Grounds?

Composting kitchen scraps with worms, although regular composting creates healthy food to your crops, however vermicomposting, enriches the compost even more. Castings that provide nutrients for your backyard are excreted by the worms. Worms prefer to eat coffee grounds, but provide them to keep their house in acidity levels that are appropriate.

Worms Like Coffee Grounds

Worms enjoy many of the very same foods you do, such as coffee grounds. They enjoy coffee grounds so much that Cornell University recommends lining a composting pile that is conventional to attract worms. The coffee grounds create a yummy addition to other kitchen scraps such as vegetable and fruit waste, leftover pasta or oatmeal. Worms need some gritty foods to help their gizzards with digestion, and that’s where java grounds actually shine in the vermicomposting bin.

The Downside

Adding a massive volume of coffee grounds adversely impacts the vermicomposting by making it acidic bin. Too much acid in the bed, or a low pH level, can burn off the worms’ skin. Use a pH test strip in the bedding. Worms live best in an environment with a pH of 6.0 to 8.0. If the pH is lower than 6.0, then add crushed eggshells into the bin to help neutralize the acid.

How Much Is Too Much

No exact rule exists about how often to include coffee grounds to your bin. It depends in part on the size of the bin, what foods you include and the number of worms reside in the bin. Generally, it should be safe to include coffee grounds when you place other food if you are adding some grains and fruit stir in the day’s coffee grounds. You may not feed your worms when it’s not time to feed the 27, so don’t add java grounds. In addition, don’t add mostly coffee grounds with a few other kitchen bits the java should make up a portion of the meal, not the majority. If you notice rather than creating a nice odor the bin smells somewhat like vinegar, you may be adding too many coffee grounds. The vinegar odor means that the bin is becoming too acidic.

Feeding Worms that the Filter

About trying to shake coffee grounds off the filters, do not be concerned — that the worms enjoy the filters. Vermicomposting bins use bedding such as shredded newspaper or cardboard. When kept moist, the bedding provides a secure house for worms to burrow through. The used coffee filter functions as additional bedding for the worms.

See related

Fertilizing African Violet Plantlets

African violet (Saintpaulia spp.) Produces plantlets from divided plants and leaf cuttings. Normally grown as houseplants, African violets are tropical perennial plants, and maybe grow outdoors in U.S. Department of Agriculture plant hardiness zones 11 through 12. Flower colors range from white through pink and fuchsia into blue-violet, and plants grow 6 to 16 inches wide, depending on the range. African violet plantlets require only small quantities of fertilizer.

In the Soil

Specialized potting soil feeds fresh African violet plantlets. Small plantlets from African violet leaf cuttings and divided plants don’t require fertilizer. When transplanting plantlets into new pots, use a specialized African violet potting soil, which prevents over-fertilization. African violet potting soil is slightly acidic and contains enough nutrients to feed the plantlets while they build their root systems. Fill 2- or 2 1/2-inch pots using 0.21-0.11-0.16 potting soil, and plant the African violets in order that their lowest leaves have been just above the ground. Water the pots and then let them drain thoroughly. Always use pots with drainage holes.

Little by Little

Applying just a small fertilizer when African violet increase slows down supplies all their requirements. Over-fertilized African violet plantlets grow poorly. New leaves on over-fertilized plants look hardened, as well as the plants develop tight centers. To prevent over-fertilizing plantlets, wait till their growth goes down and look for signs of yellowing old leaves, but be careful — plantlets that get too much lighting can develop the same symptoms. If you are unsure whether your African violet plantlets require fluid, fertilize one or two. If the leaf colour and increase improves, fertilize another plantlets. African violets need bright, indirect lighting, like a place about 3 feet from a southeast- or west-facing window.

Feeding Time

Watering and fertilizing African violet plantlets usually occurs at the same time. African violets are susceptible to crown and root diseases caused by excessively moist potting soil, so don’t water the plantlets until the ground is dry to the touch. Dilute a 7-7-7 African violet fertilizer at a rate of 7 to 10 drops per 1 quart of lukewarm water, and apply the mixture to water the plantlets, or apply the fertilizer based on the manufacturer’s directions. Either stand the pots in 1 inch of fluid mixture and lift them out when the soil surface is moist, or pour the mixture into the pot until it looks through the drainage holes. Don’t receive any of this solution on the leaves. Catch the watered pots to drain thoroughly before replacing them on their own drip trays. African violets usually stop growing in winter. Water the plantlets in order that the potting soil surface is just moist, and don’t apply fertilizer.

Care Package

African violet plantlets prosper when conditions are correct. Nighttime temperatures between 65 and 70 degrees Fahrenheit are ideal for African violets, but plantlets grow anywhere in the assortment of 60 to 80 F. Growth slows down and flowering is reduced when temperatures are too high or too low. Chilled African violets turn dark, become water-soaked and wither. Put the pots in their drip strips to a flat container of sand or gravel full of water to give a humid atmosphere around the plants. Don’t allow plants to stand in water, and don’t drip water on their leaves because this causes unsightly spots.

See related