Owning a New Bath Vs. Remodeling an present Bath

Bathroom renovation, on a cost-per-square-foot basis, is among the most expensive home construction jobs, and when an old toilet begs for replacement, the cost difference between a remodel and also a new addition is an important consideration. In most cases, renovation will be more economical than an addition, but the benefit of one option over the other isn’t always clear cut.

Total Cost

Generally speaking, the cost of renovating a toilet will be cheaper than constructing a new one in case the homeowner is able to retain the vast majority of the room’s construction, mechanical systems and finishes. The price of constructing a new room is much more than the cost of renovation if the inclusion alters the property’s footprint, makes significant changes to plumbing or electrical systems, or needs extensive replacement of fixtures and finishes such as flooring and wall coverings.

Fixtures and Finishes

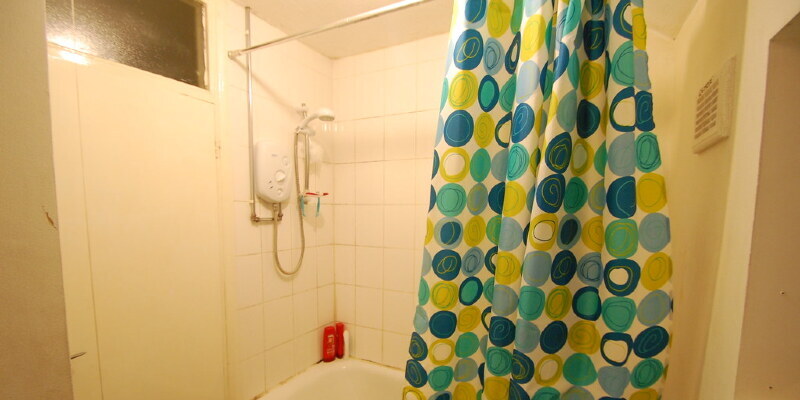
Replacement of finishes and fixtures is usually a goal of a bathroom remodel, so in this area, the cost difference between a renovation and an addition is minimum. In some cases, however, the reuse of existing fixtures is possible. If the present bathtub is in good shape, as an example, it might be a good idea to keep it; replacing a bathtub will add labor costs to your remodel in addition to the cost of the bathtub itself. Refinishing a cast iron bathtub is also frequently a cost-effective option to buying a new bathtub.

Systems

Material and labor costs associated with plumbing systems are a significant component in the overall cost of a bathroom remodel or addition, and also the more changes that will need to be made to the plumbing, the more expensive the project will be. In a relatively minor remodel, where new fixtures are installed at exactly the same places as existing fixtures, the plumbing may need no renovation. Moving fixtures or adding new ones will add significantly to the plumbing expenses, and including a new toilet will, of course, require the inclusion of entirely new plumbing systems.

Environmental Impact

The setup of new, efficient fixtures will turn an old toilet into a more environmentally friendly room; several newer bathrooms and shower heads in particular are intended to use much less water than older versions, and replacing ineffective models can reduce the long-term cost of a bathroom remodel too. But replacing fixtures and rebuilding the toilet will create waste and refuse that will probably be taken to a landfill; in terms of waste production, a minor renovation generally less of an environmental impact than a new bathroom addition.

See related

Types of Greenhouse Plastic Film

Glass is the standard material for greenhouses, but with improvements in technology, several kinds of expensive plastic greenhouse coverings are available for commercial greenhouse operators and hobbyists. Some plastic materials are apparent, allowing full sunlight to enter the greenhouse, while other plastics are translucent to diffuse the lighting within the greenhouse.

Polyethylene Film

Polyethylene, or PE, film is the lightest solution for greenhouse plastics. It is available in large rolls which you simply cut to match your greenhouse’s frame. Manufacturer’s of polyethylene movie make different grades, based on the amount of years you can expect it to last. One-year movie is the least expensive, thinnest variety, and four-year movie is the thickest. Ultraviolet light fast degrades polyethylene movie, so select a movie with UV protection embedded in the plastic. Some polyethylene films have also chemical properties fabricated into them to reduce the amount of condensation on the glass. Others have the ability to reflect radiated heat back into the greenhouse, much like glass does. This makes the plastic movies more energy-efficient.

Polyvinyl Chloride

Polyvinyl chloride, or PVC, film has several of the same qualities as polyethylene film. PVC film is more expensive than PE movie, but you can expect it to last up to five years. PVC film is available in 4- to 6-foot widths. Materials utilized in the manufacture of PVC film have a tendency to work as a magnet to dust particles from the air. You’ll need to occasionally rinse the movie if you live in an area which doesn’t have regular rain showers. PVC plastic is available with UV protection and also you’ll be able to find PVC that reduces condensation.

Double Walled Plastic

It is possible to set up either PE or PVC plastic film in a dual layer over a greenhouse frame to make the exterior stronger. Should you use a dual wall of plastic film, you will need to use a fan to blow air between the two layers to prevent them in adhering to one another. Light transmission to your greenhouse through a single layer of PE or PVC is 85 percent. The addition of a second layer of plastic film reduces that to 77 percent.

Polycarbonate

Polycarbonate plastic film comes at a rigid format which makes it simple install on the greenhouse’s frame. Some polycarbonate is corrugated, while other products have 2 smooth outer layers which encase an inner corrugated structure, much like that of a cardboard box. Polycarbonate material allows around 91 percent of the lighting to the greenhouse. Polycarbonate is impact-resistant and durable, lasting around 15 years. A disadvantage of polycarbonate is its surface scratches easily.

See related

Installing an Attic Fan

Attic fans draw super-heated atmosphere from attic spaces and vent it to the outside. While attic fans do not have an immediate affect on the heat inside living spaces, they do help alleviate some strain on air-conditioning systems. These fans function automatically through the heat of the day, supplying active air movement inside the attic once the home needs it most. Installation involves cutting holes in the home, putting electric connections, and doing some heavy lifting.

Fan Type

Choose which kind of fan you want for your home. Attic fans mount on the roof or in one of the gables. The principles of the way they function are the same. Both units draw cooler air from outside the attic — via soffit or other attic vents — and expel it into the outside through the fan opening. This creates air movement inside the attic space.

Cuts

Roof-mounted attic fans require the elimination of roof sheathing and shingles by cutting them using a power saw. Gable-mounted fans typically need minor expansion of the existing opening in case a gable vent is currently set up. If no vent exists, you must cut siding and wall sheathing to produce the essential opening.

Mounting the Fan

Roof-mounted fans come with a base made from plastic or sheet metal. The base sits on top of this roof and functions like both a mounting plate and roof flashing. Once the fan is set up, you can cover the base with roofing stuff as you would with any flashing. Gable-mounted fans need a good base, typically made from plywood, using a cutout for the buff. The plywood attaches to studs in the attic, and the fan attaches to the plywood. Some gable-mounted units arrive with a pre-fabricated metal base.

Electrical Hookups

An attic fan will typically need 4 to 5 amps of service. A conventional 15-amp dwelling circuit can handle up to 10 electric boxes that service a mild or electric outlet. Homes using a 20-amp circuit can handle up to 13 boxes. In case an existing circuit nearby cannot deal with the additional load of the attic fan, you might need to conduct a new 15-amp circuit into the space. The fan will also require electrical connections to power it along with the thermostat to control when the fan runs. If you’re not familiar with creating electrical connections or running circuits, then contact an electrician.

Safety Considerations

Your attic fan should have a firestat for part of its structure. This system closes down an operating attic fan when it detects extremely substantial temperatures. This is a security consideration in case of a fire. Should the attic fan continue to function during a fire, it could create a draft that would create the blaze to spread fast.

See related

Assist Installing a New Home Thermostat

A brand new thermostat can save you a considerable sum of money spent on heating and cooling bills each year. Most programmable thermostats enable you to set separate temperatures for different times of the day or night, automatically decreasing the amount you spend to heat or cool your home when no one is home. Some thermostats have a setting for every day of this week, or even a vacation setting so you are not over-spending on power costs while from town. Installing a new home thermostat can be completed in under an hour using a few simple hand tools.

Switch off the circuit breaker that offers power to the HVAC unit to that the older thermostat is connected.

Remove the cover plate from the front of the existing thermostat. Unscrew the two mounting screws holding the thermostat body onto the wall.

Unscrew one of those terminal screws onto that the wires are connected to the thermostat’s terminal block, and pull off the wire. Pull the cable through the back of the thermostat body and wrap a piece of masking tape wrap across the end of the cable creating a masking tape flag. Write the letter tagged straight over the terminal where you removed the cable onto the masking tape flag using a pencil. Repeat the procedure by removing each cable and labeling it using the letter from the terminal. Set the thermostat body apart after all wires are labeled and removed.

Slide the wires through the hole at the back of the new home thermostat physique, and position the body against the wall. Mark the hole locations throughout the body onto the wall using a pencil, then eliminate the thermostat body from the wall.

Drill a pilot hole through each of the hole places into the drywall using a power drill. Then tap a drywall anchor into each hole with a hammer.

Slide the wires back through the hole at the back of the thermostat body and position the body against the wall. Mount the body into the wall with the included mounting screws using a screwdriver.

Attach each cable with into this terminal corresponding to the marks on the masking tape flags. Wrap the cable around the proper terminal screw and tighten the screw with a screwdriver.

Install the batteries that came with the thermostat to the battery compartment, then mount the cover above the thermostat body.

Turn the power to the HVAC unit and then test the operation of the thermostat.

See related

How Toxic Are Geraniums to Dogs?

Many plants contain toxic substances which could harm dogs. Your dog might experience severe or mild symptoms depending on the plant’s chemicals and the area of the exposure. The widely used geranium (Pelargonium spp.) , planted in pots and gardens, are toxic to dogs. Puppies are especially vulnerable, because they will try to taste almost anythingelse.

Geraniums

You may be confused regarding which of the two sorts of geraniums is toxic. Every type of geranium comes in hundreds of varieties, but the geraniums of this genus Geranium, also referred to as cranesbill, are not toxic. Cranesbill contains annual, biennial and perennial plants, bearing pink, blue, purple or white flowers with five symmetrical petals. All these low-growing geraniums with stems that spread out make useful rock garden plants. The other common geranium (Pelargonium spp.) Has asymmetrical flowers in enormous variations depending on the cultivar. It’s toxic to cats and dogs. These frost-tender geraniums include the zonal and ivy-leaved geraniums. The stiff leaves of those geraniums have scalloped leaves and dark markers surround the borders. The leaves contain aromatic essential oils.

Geranium’s Toxins

Two chemicals at geraniums — geraniol and linalool — are toxic to dogs, according to the American Society for the Prevention of Cruelty to Animals. Geraniol and linalool give fragrance to botanical oils, and also cause skin irritation and skin allergies in susceptible men and women. These substances can also be used as insect repellents.

Toxicity Symptoms

The signs and symptoms of geranium toxicity are vomiting, lethargy, lack of appetite and skin rash. Vomiting, soon after eating geranium leaves, might be the first indication that your dog is sick. Other symptoms, such as lethargy or depression, are caused by the slowing of the human body’s metabolism. Your dog’s heart rate and blood pressure may become lower. Loss of appetite may cause anorexia and nutritional deficiencies if it continues. It your dog’s skin contacts geranium leaves, especially chewed or torn leaves, a skin rash may develop in the affected regions.

Treatment

Observe your dog if you believe it chewed on geranium leaves or rolled about among geranium plants. Some puppies may only have mild symptoms, but if you become aware of geranium toxicity symptoms, call your vet or the ASPCA Animal Poison Control Hotline (888-426-4435) for guidance. Wash affected skin areas with large quantities of warm water featuring some dishwashing liquid.

See related

Instructions for Sewing Curtain Panels Together

When the curtains you have your heart set on only aren’t wide enough for your window, there is a solution: Stitch two panels together to create an extra-wide curtain. This job takes a bit of attention and time, but it can be achieved with basic machine-sewing skills. It’s easiest to use unlined panels which are simply hemmed on all four sides, but it is possible to adjust the procedure to rod pockets and other header fashions.

Put two curtain panels together, right-sides facing, and upper and bottom hems matching. Pin along one long side. Using scissors or a rotary cutter and mat, cut off the hem on that side, cutting through both panels and the top and bottom hems. Remove the pins.

Open approximately 12 inches of the top and bottom hems of the panels with a seam ripper and beginning at the cut edge of their hems. Iron the opened hems to eliminate the folds and flatten the stuff.

Pin the two panels together, right-sides facing, together with all the cut edges and top and bottom edges matching. Stitch a plain flux along the cut edge, from the very top to bottom of this panel. Use a 1/2-inch tolerance for closely insulation, or even a 5/8-inch if the material is gauzy or loosely woven. Trim the seam allowance with pinking shears to prevent raveling. Press the seam open.

Fold the opened top and bottom hems along the flux to coincide with their initial positioning. Press and pin in place. Stitch the hems throughout the opening, extending 1 inch above the stitching on each side. Pull the thread ends into the incorrect side of the hem; tie in a knot and trim. The enlarged curtain panel is now ready to hang.

See related

How to Hang Wreaths on Big Front Doors

Big front doors make impressive entryways, but can be embarrassing to dress using a turtle. A good-looking turtle is frequently the expected adornment for seasonal curb appeal or holiday festivity, but only as long as it suits the door. Get the look you are after by hanging the best sized turtle at the appropriate height, employing a suitable hanging method.

Door to Wreath Ratio

An average door is 80 inches high and 36 inches wide, and also an average-sized wreath is all about 23 inches in diameter. Using these dimensions to your door-to-wreath ratio, select a wreath that suitably fills or covers about two-thirds of the door’s width. As an example, if your door is 42 inches wide, opt for a wreath that is approximately 28 inches in diameter.

Wide Ribbon

Strong ribbon can support a wreath on a big door and look good doing it. Loop a long enough period of ornamental ribbon through the wreath’s center or its hanger so it can go from the door top, centering the wreath at eye level, and back up. It should be 3 inches or so broad to appear substantial against a oversized door. Use a couple of flat-head tacks or a nail to attach the ribbon ends to the door top.

Sight Line

For a cleaner or more compact wreath, hang it with invisible monofilament or fishing line instead of decoration — 5- to 10-pound test line should suffice, based on the wreath’s weight. Tie or wrap the line around a flat-head nail on top of the door before hammering down the nail.

Up and Over

As the name implies, an over-the-door wreath hanger simply hooks in place over the door. The hanger might not bring the decoration low enough, but on a very tall door. If a long, sturdy hanger designed for big wreaths does not bring the wreath to eye level, utilize broad decoration or durable garland within an extension. Alternatively, make your personal custom-sized over-the-door wreath hanger using sheet metal, if you are metal-work savvy. File and sand the edges smooth, so they’re hand and door safe. Utilize steel crimps to form the fundamental square folds to get over the door, and also the hook-like folds to hold the wreath.

Window of Opportunity

Should you door has a window, then hang the wreath on it to enjoy from either side. Utilize a heavy-duty suction-cup hook to get this hanging method. A 20-pound-capacity hook ought to be powerful enough to hold a large wreath set up as the door swings opened and closed.

Scratch-Free Remedy

A large wreath or hardened hanger can leave scratches in your door. Reduce the chance of unsightly damage with bubble wrap or felt. Secure the protective material to the door, the back of the wreath or the hanger, as needed, using low-residue painter’s tape.

Big Thoughts

If you have double front doors, hang a wreath on each one. For an extra-tall door — 8-feet high or so — hang two or three wreaths, one below the other, joining them using fishing line or decoration. If your door is flanked by big sidelights and a transom above, hang beefy garland round the perimeter to complement the wreath and finish your festive appearance.

See related

Styles of Bath Carts

If you like the appearance of a kitchen island but do not have enough space to fit a bulky cabinet piece, a kitchen cart is a better choice. Smaller and often mobile, kitchen carts deliver much-needed extra storage and work surfaces in cramped spaces. Before choosing one for your own kitchen, think about your storage requirements, your decorating style and your available space. You’ll come across carts in a variety of sizes and materials, therefore having an idea about what is ideal for your kitchen makes your choice easier once you start shopping.

Metal Carts

Stainless steel carts lend an industrial sense to a kitchen and work well in modern spaces with slick lines. They are simple to clean and maintain, which makes them a popular choice for couples that are nerve-racking. Some stainless steel heaters come with a wooden butcher-block shirt, which can be more functional than a metallic surface for food preparation, in addition to offering a visually appealing extension of the countertop. If your cart has a steel surface, then only put a cutting board on top if you plan to chop food.

Wooden Carts

Kitchen carts crafted from wood are another popular choice. They make a nice addition to conventional and cottage-style kitchens. These carts could have open shelving suitable for baskets and display, or else they might feature shut drawers which provide an effect similar to cabinetry. You’ll see wooden kitchen heaters in both natural wood stains and painted finishes. Now you ought to be able to pick tops at various surface materials too, from butcher block to stainless steel to granite.

The Wheels

Many carts, regardless of the material, come with attached wheels (casters) as a standard feature. The casters let you move the unit to your place at any moment, making, say, another work surface in the conclusion of a countertop or a serving place in the center of the kitchen. When deciding on a rolling cart, make certain the casters have a locking mechanism to prevent unexpected movement, particularly in the event that you’re planning to use the cart often for food recovery.

Unique Attributes

When choosing a kitchen cart, you’ll realize that lots of boast special characteristics that help them work harder in your own space. A drop-leaf shirt, which is attached with hinges, is a frequent addition, particularly on wooden carts. You may raise the very best when additional work surface is necessary, or leave it lowered to save space when the cart is not in use. Other helpful exceptional features include hooks, towel bars and wine racks.

See related