Kitchen of the Week: Practical Beauty at Dallas

After five decades of living together with her 1952 ranch kitchen, Deb Young decided she was done using all the dilapidated material palette. Sticking with the kitchen’s unique layout and deciding on all of the materials beforehand helped her cut down on the remodel’s price and time. Only one month of construction resulted in a brand new, contemporary kitchen with plenty of practical additions.

Kitchen at a Glance
Location: Lakewood area of Dallas
Size: 13 by 17 feet
Budget: $25,000

Young and her family lived with all the obsolete setup for so long partly to save cash and partly to put a disruptive remodel, but also because it gave them insight about what needed to be fixed.

Young had an additional stainless steel sink custom made. The Grohe faucet handle turns into the sink, instead of to the side, so wet palms do not drip on the counter prior to doing dishes. “It’s easier for the 7-year-old to achieve, too,” she says.

Faucet: Grohe Concetto

Young was never a fan of their first layout, but the cabinetry and appliances were in great shape. Rather than pull them out, she stuck to the basic layout, saving cash for future bathroom renovations.

Cabinetry: solid Lyptus stained in walnut; paint:White Dove, Benjamin Moore; countertops: Luce de Luna quartzite, stainless perimeter

Choosing the colors and materials was all about practicality. Dark cabinets, sturdy flooring and stainless steel–lined countertops can all stand up to heavy family use.

Backsplash: fireclay tile, Crater Lake

Before Photo

The prior all-white cabinets put every speck of dirt and spilled drop of coffee on display. The awkward handles also made it hard to clean the entire door fronts.

Dark stained doors now conceal most stains, and easy hardware is not difficult to clean around and under. “At no point did I put anything in this kitchen that wasn’t practical because it had been pretty,” says Young.

From the beginning, Young knew she wanted to keep the first pivoting bar top. Connected to the countertop with a rotating grommet, it’s an incredibly functional seating solution for this particular kitchen’s layout.

On the other side of the rotating bar, a lockable caster allows for seamless movement. When it’s time to consume, the bar drops into the kitchen, stopping just short of the island. When it’s time to clean or entertain, it slides back into place against the window.

Flooring: Volcanic Ash Marmoleum

Selecting flooring was simple — Young knew in the get-go that she wanted to use Marmoleum. This legitimate linoleum product is frequently used in schools and hospitals because it’s extra durable but still feels soft and works well. Even though it took some time to find someone to put in it in a residential project, it had been worth the hunt.

Bar stools: CB2

This existing cabinets got a fresh update with walnut-stained panels and new hardware.

Texas artwork: Draplin Design

Before Photo

The kitchen previous finishes were completely worn out. The yellow paint peeled off the walls in areas, the vinyl floor had stains, the cast iron sink had massive scratches, and the laminate countertops had their fair share of burns and stains.

The older island’s open shelving did not provide enough storage for the Youngs, and food was constantly falling upon the open shelves. Adding several pullout drawers made additional, defined storage space.

Dishwasher: Miele

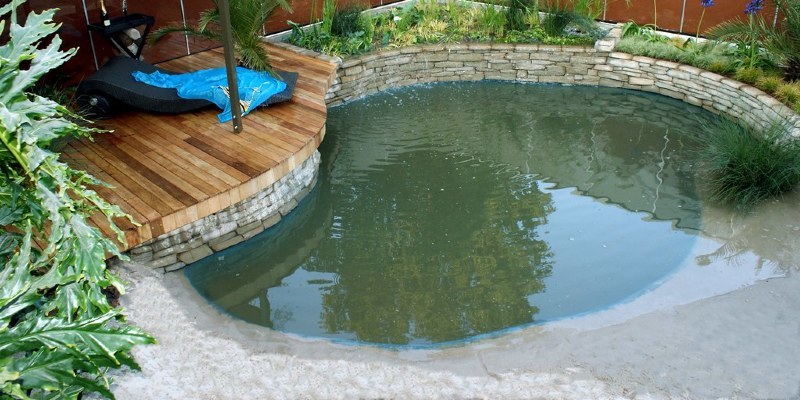
The Marmoleum flows into an adjacent hallway — the key route to the family’s backyard swimming pool.

Before Photo

While Young adored the existing glass-front refrigerator, it did not have the storage that she wanted — particularly when it came to ice for drinks during summer parties.

New refrigerator and freezer drawers were a splurge for the brand new bar area, but they make a significant difference when it comes to the family’s daily actions and enjoy of entertaining.

Bubble glass above the bar provides a little bit of contrast. “We put glass there because it permits our friends to wander in and help themselves to drinks,” says Young. “It’s easier for them to do so if they could see what’s in the cabinets”

Refrigerator: Jenn-Air

Your turn: Can you just redo your kitchen? We’d like to hear about it and see a photograph below!

See related

Stoke Your Fireplace Layout With Decorative Screens and Doors

Both practical and decorative, fireplace doors and displays keep your fire safely contained while being a gorgeous part in your fireplace’s layout. Whether custom made or shop bought, these works of art come in infinite styles, finishes and fabrics. In case you have an old or slightly used fireplace that will use some updating, consider replacing the screen or door for a quick and cost-effective makeover.

See whether any of those gorgeous fireplace displays inspire you.

S / Wiley Interior Photography

Constructed in. These Mediterranean-style iron doors have been permanently attached to the exterior of the fireplace with decorative hinges. With a layout like this, it’s the hinges that can attract attention.

Hint: Not only are those doors amazing, but they possess the additional structural integrity required to keep pets and kids safe.

AMI Designs

Designer. This high-style freestanding fireplace screen in polished chrome has an elegant look that’s just the correct touch for this perfectly accessorized interior.

Hint: Place birch logs within the fireplace opening for decoration and depth.

Smith & Vansant Architects PC

Glass. Shut off a burning flame completely while enjoying the view with glass fireplace doors, like in this picture. Stone and glass make for a gorgeous combination.

Hint: If you decide on glass to your fireplace door, then take note that it’s going to take a good cleaning every so often.

Irwin Feld Design

Artistic. Get creative by custom design your fireplace screen. This built-in version of a metallic screen overlaps the surrounding fireplace opening to make a look all of its own. Bravo for creativity!

Hint: Having this much metal around the fireplace opening appears very cool, but beware — the alloy can become very hot.

Brian Watford Interiors

Freestanding. This classic-looking fireplace screen stands in its vertical position by mounted angle mounts (behind the screen) and decorative feet.

Hint: The best part about a freestanding fireplace screen is the fact that it makes cleaning the interior of the fireplace much easier than with a built-in screen.

Clockwork

Mesh. If you forgo a fireplace door, then try this very traditional metallic mesh drape. If you need to access the fireplace opening, then simply pull back the curtain.

Hint: Mesh curtains, like the one here, are cheap and seem almost invisible once the flame is burning.

Kristen Rivoli Interior Design

Utilitarian. This freestanding fireplace screen serves double duty. Each side of the screen is actually the hanging rail for your fireplace fittings (shovel, poker and broom).

Hint: Fireplace accessories may look great when they are first bought, but you may want to think twice about having them out on screen as soon as they have been used. Black soot and ashes may rub away from them onto furniture and fabrics.

Vanni Archive/Architectural Photography

Ornate. It’s not appropriate for every interior, however this freestanding fireplace screen is the perfect fit for this conventional wood fireplace. I love its ornate scalloped corners, feet and decorative finials.

Tip: Like the screen layout but not the metal? Utilize a high-temperature spray paint to turn it in a piece you love.

More: 10 Ways to Repair Your Fireplace Up With a Screen Star

See related

Kitchen of the Week: a Dining Nook for 16 and Turquoise Tile

Unhappy with their humdrum, builder-grade kitchen at Rancho Santa Fe, California, these homeowners needed something that would permit them and their four kids to do what they love most: amuse. Interior designer Kari Arendsen and her staff in Intimate Living Interiors responded by gutting the space, including more storage, installing an extra-large stove for whipping up massive dishes for numerous guests, and producing a customized island that could accommodate everything from prep work into serving. A mirrored wood plank, bold turquoise backsplash and custom dining room add character, while durable materials, such as bleached oak floors and marble counters, will suit this busy family for years to come.

The sink previous location determined the design of the area, as the homeowners needed to avoid moving any pipes. They also wanted to get a very clear view of the backyard when doing dishes.

A French armoire adds storage for mugs and cookware. “it is a refreshing departure from just doing all cupboards,” Arendsen states.

Range: 60-inch Wolf; faucet: Rohl; faucet fixtures: Jalco

Intimate Living Interiors

Turquoise arabesco tile is repeated in the backsplash and the custom made island’s built in pet dining area. The repeating pattern and color produce symmetry and stream without taking away from the clean appearance of the custom white paint walnut cabinetry and bleached oak floors.

The home is part of a development community, also Arendsen wanted to create this new kitchen stand out. The mix of textures — Calacatta marble, arabesco tile and the worn metal of this chandelier — give the kitchen character and depth.

Chandelier: Amarass, Joss and Main

The wooden plank over the stove was found at a reclaimed-wood lawn. Arendsen and her staff screwed a small, unique piece of metal hardware they found in San Francisco into the board.

The formerly tiny dining area that was connected to the kitchen is now a cozy corner and bar area that seats 16 people. The habit tables have removable glass tops so the family can rotate in various design patterns beneath.

The zinc and leather seats were added with the growing youngsters in your mind. Wear and tear over the years will add character to the materials.

See more Kitchens of the Week

See related

Summer Plants: How to Boost Tomatillos

Tomatillos, also referred to as husk tomatoes, are a vital ingredient for several Mexican dishes, such as salsa verde and enchiladas verde. They’re also yummy whether eaten raw or cooked, so why not add them to your edible garden? They have the identical basic care requirements because their tomato cousins, with the added advantage of fewer issues and a longer and frequently sooner crop, a plus in short-summer places. Additionally they reseed.

The crops resemble berries but using papery husks encasing the fruits. Green tomatillos are the most common, but it is possible to find some that are purple or yellow. Purple varieties are generally sweeter. For odd varieties check Johnny’s Selected Seeds, Seeds of Change and Seed Savers Exchange.

Notice: To put fruit, you’ll need at least two crops for cross-pollination.

When to plant: Start seeds inside five to eight weeks prior to your planned planting date; set out begins or nursery plants two weeks to a month after your last frost and after the soil is warm.

Days to maturity: 70 to 120

Light requirement: Full sun

Water necessity: Regular

Favorites: Cisneros, Fiesta Duo, Green Husk, Pineapple, Purple, Purple di Milpa, Toma Verde, Verde Pueblo, Zuni

Photo courtesy of Seed Savers Exchange

The New York Botanical Garden

Planting and care: Wait until the frost has passed and the soil has warmed up before planting outside. Pick a website with rich, well-drained soil in full sun. Work in compost plus a low-nitrogen fertilizer prior to planting.

Plant deeply, burying about two-thirds of this plant. Leave 1 1/2 to two feet between plants. Tomatillos fared well in containers. Even a 12- to 15-gallon size is good, even though they will grow bigger baskets.

Water thoroughly after planting. Add supports now also, whether conventional tomato cages, stakes or some other sturdy structure. Nonmetal stakes or cages will not burn the plant if they become hot. As the crops grow, reaching an eventual height of 3 to 4 feet, attach the stems to the supports with tender ties.

Water regularly, about 1 to 2 inches directed to the base of this plant. Keep the roots moist but not soggy Mulching helps conserve water and keep weeds down. To promote fruit set, feed the soil using a low-nitrogen fertilizer after flowers look.

Tomatillos aren’t bothered by several pests and diseases. Providing good air circulation around the plants will help stop early blight, and staking will frustrate snails and slugs. Other issues you may experience are aphids, beetles, leaf-damage pests and powdery mildew.

Harvest: select the fruit when it’s filled the husk but remains firm to touch, and the husk has become brown and began to split. Remove the husk and wash off the fruit just prior to use.

See related

What You Need to Know Before Buying Chicks

You may not think of baby chicks at the dead of winter, although the ground is frozen over and icicles are hanging out of the eaves. Cold as it may be, winter is time for ordering chicks, particularly if you’re likely to order rare-breed chicks online. If you’re likely to purchase basic White Leghorns or Rhode Island Reds from the local farm supply store, feel free to wait until spring, but for the rest of us, the time is now!

After your chicks arrive, you’ll need to have an interim place for them to stay; you can’t throw them straight into the coop. Here’s the way to take care of your infant chicks in their infancy,”teenage” months and maturity.

Designs to the hens: Chicken Coops Rule the Roost

Amy Renea

When you buy chicks online, you’re most likely buying a rare breed that cannot be found locally. You need to place your order today since the inventory begins to run out on the many gorgeous breeds the nearer we get to spring up. Obtaining your order in early ensures that you will find the strains you desire. The chicks will arrive in spring, and they will be literally a day old.

Before ordering chicks, first make sure that your neighborhood statutes and town zoning laws allow you to raise cows. Asking your neighbors about their own tastes is also a nice gesture when considering raising a flock.

Amy Renea

Chicks are sent in cardboard boxes throughout the country whenever they’re hatched. As crazy as that sounds, the chicks arrive happy and healthy.

When intending a temporary home for chicks, note the industrial shipping boxes used. Made from cardboard, the boxes give little chick feet something to hold onto. You do not want to place chicks in a slick plastic or metal container, since their feet and feet will not develop correctly. You’ll also require a simple heat lamp or quite warm room for those chicks in the beginning.

Amy Renea

Take a peek in the shipping box and then notice the thin and soft bedding material. When designing your chicks’ first home, choose the smallest pine shavings or perhaps hamster bedding in the beginning. Avoid cedar chips, as these can damage the chicks’ lungs.

While chicks will gradually go outdoors to open grazing, it is a bad place for them initially. Although chicks survive just fine outdoors with their mom in nature,”orphan” chicks will not survive out in the open by themselves, without heat and security.

Lindsay von Hagel

The second worst place for the chicks is your coop, with its mature chickens, thick bedding and spacious water pans. They can drown in the water and become trapped under bed. Mature cows will even peck in the babies.

Amy Renea

Baby chicks may also start pecking at one another. If it comes to pass, it is vital to separate the injured chick. So be prepared to have a lot of spaces inside and then outdoors to house the chicks.

Williams-Sonoma

Alexandria Chicken Coop and Run – $1,499.95

A moveable chicken tractor is the best set up for integrating chicks to the outdoors. After they sleep inside at night, you can let them to the guarded part of the tractor each day. The mature cows can roam around in the grass surrounding the tractor, permitting both flocks to get used to one another.

A triangular design functions well with this adjustment period as well. If you’ll be raising new chicks each year, you may want to consider this design.

If you’ve got a small coop, consider letting the adult chickens out in the early hours, putting the chicks indoors, and then shifting through the nighttime. Chicks can get accustomed to the coop without being at risk in the adults.

Amy Renea

Once chicks can jump to nesting boxes and up a small scale or ladder, they can start seeing the”grown-up” coop through the day.

Amy Renea

Placing nesting boxes levels allows the smaller cows to become accustomed to flying into the boxes, while leaving space for the adults to lay their eggs at the higher boxes.

eric marcus studio

Straightforward ramps can allow”teenager” cows to go just about everywhere. A simple plank design with small cross pieces can allow small cows to get to and from the coop, feeding areas and nesting areas.

Avant Garden

A fenced-in area with a enclosed coop also functions well to integrate younger and mature chickens. Since the chickens become used to one another, they have different space to move in, and fighting is kept to a minimal.

eric marcus studio

In your roosting setup, make sure there is more than enough space for both mature and younger chickens. When there’s limited space, the adults will strike the smaller cows when they try to roost. Multiples bars or multiple roosting spaces solve this problem.

While natural predators and mature chickens are often the best threat to your chicks, a housecat can cause difficulties as well. Housecats are usually uninterested in chicks and are intimidated by full-grown chickens, but teenage cows would be the ideal age for them to pursue. Make sure housecats are introduced to the chickens early, so that they can get used to them, but do not expect them about chicks between 6 and 3 months old.

Janiczek Homes

To recap, while purchasing buying chicks in the farm store or online may be a simple endeavor, their care once they arrive at your doorstep is more involved. Make sure you have an easy, warm setup when they arrive. If you’ve got adult chickens and other animals, make different spaces for the new chicks. Be cautious of dangers like open water utensils, heavy bedding and housecats. Nip any poultry bullying in the bud immediately. While raising chicks is much more work than purchasing pullets, it is definitely enjoyable and well worth the effort.

More:
Chicken Coops Rule the Roost
The Twist on Chicken Coops

See related

How to Plan a Just-Right Living Room Layout

Whether you are constructing a new home, remodeling an existing living room or just rearranging furniture you already have, laying out your living room is best done with a plan in your mind. It may seem to be a very simple matter of rolling up a chair over here and squishing the couch over there, but even the simplest elements of space planning can get complex quickly. Before you start doing some heavy lifting, consider these professional living room layout tips.

Habitar Design

Planning. Analyze how that you spend time on your living room. Nashville interior designer Kippie Leland suggests writing down everything that you plan to get there. “This can allow you to prioritize when you reach the furniture planning phase,” says Leland.

Then consider traffic and dialogue flow. How can you enter a room? Move between chairs? Get around the corner of a sofa? “You don’t ever want to feel trapped or feel as if you are making laps around an area to get out or in,” states Minneapolis interior designer Lucy Penfield. And “do not locate the back of a sofa by the entry,” says Colorado interior designer Andrea Schumacher. “It should be installed so you could walk in and out of the room easily.”

Don’t leave too much distance between seating, so conversation can flow readily.

The Cross Interior Design

Arranging and rearranging. Everybody has an individual preference when it comes to arranging furniture. Some individuals prefer to take their time and plan out every detail. For those, Leland suggests starting off with a scaled drawing of this room, measuring the existing furniture and making to-scale cutouts of each piece to play with. “It is much easier on your back to rearrange on paper than to transfer the furniture,” she states.

There’s a different route for people who prefer to be spontaneous. “Block out a good hour or so, bring a friend along or your own family, and really move things around,” states Penfield. Move out everything that’s simple to carry first, just to find a new view of this room. Then switch it all up — even take out the carpet to learn what the room looks like without it. “Every time you come up with a fresh configuration, take a little time to sit down and see how it feels,” she states.

A few things to remember, regardless of what arrangement you decide on:Try to maintain 15 to 18 inches involving upholstery and the coffee table. Be certain that you have 2 to 4 feet of walking distance in a most important pathway. If you opt to put your furniture within an angle, know that it’ll take up a lot of extra space. Try symmetry first — that often works well in living rooms.

Meredith Heron Design

Keeping things to scale. All of the designers here highlight the importance of furniture size in a living room. “Properly scaled furniture may make or break a room,” says Austin, Texas, designer Allison Jaffe. “Having too much room or too little room can really throw away the look and feel of this room.”

Just because the scale and size of a bit appears right in a shop doesn’t mean it’ll feel right on your living room. Larger rooms require larger furniture, and bigger rooms require a bigger scale.

But above all else, make sure everything you buy is comfortable too. “Select furniture that fits you,” says Schumacher. “Try out different sized pieces. We’ve found some people prefer larger furniture they could flake out, and some people prefer more miniature furniture”

Terracotta Design Build

Purchasing furniture. A brand new living room usually means some new furniture — at the very least a bit here and there. Jaffe suggests because it will be the piece in the room, picking the sofa first . “When purchasing a sofa, go moderate in proportion, for it may be used at a future home in the library or den,” adds Leland.

Contemplate your entertaining needs and choose furniture which may be used with larger groups if necessary. Slip a bench or locate ottomans which may be used as side tables or seating.

Dana Nichols

Handling the TV. The TV is not necessarily pretty, but for a lot of us, it’s a must-have at the living room. Fortunately, the design issue is lessened by flat-screen televisions. Keep relaxation in mind when putting your TV — make sure not to hang it in a height that will make your throat ache. Above the fireplace may be too large, unless the couch has enough distance so that your neck doesn’t have to strain. But, Jaffe advises to not put the TV over 10 ft or less than 6 ft away from the sofa.

You may not want your TV to become the room’s focal point (regardless of how proud of it you’re). “Do you want a black hole dangling in a significant visual location in the room?” Says Leland. Consider placing it on a bookshelf which flanks the fireplace or on a buffet from the wall.

More about putting your flat-screen TV

Inform us What have you learned while setting out your living room?

See related

Beat Winter's Chill With an Indoor Picnic

Picnics are among life’s simple pleasures, but winter, naturally, is normally too cold for individuals in most areas to head outside with a basket and blanket. It is still possible, but to enjoy the fun and love of picnic dining now; just recreate the encounter indoors. It is a great way to package in friends and family, even when you don’t have a great deal of traditional dining space. Get motivated by this particular indoor picnic spread.

Holly Marder

The Setting

A indoor picnic is a wonderful opportunity to snuggle up on the floor with a few comfy blankets and pillows with a loved one. And if you are hosting several guests, then it is also a creative alternative when dining room is limited. If your house is blessed with a great view, clear a place beside the window for your installation.

Picnic basket: Picknickshop; plaid blanket: Hermine, Ikea; poufs: Slumber and Bonnet, Casalis; gray platter: Serholt Sweden

Holly Marder

Just as you would do outdoors, make things comfy with a plentiful supply of picnic blankets. Take advantage of being indoors by integrating throw cushions as well as a few poufs.

Holly Marder

Bring the outside in by incorporating some greenery into your picnic setting. The plant is a species of eucalyptus.

When you have a fireplace, make sure that you’re ready with a supply of chopped wood. A crackling fire is a certain way to amp up the coziness element.

Holly Marder

The Meal

Getting your picnic indoors also suggests you could employ your loved ones dishes and cutlery. This picnic set includes cutlery and dishes, but trendy compostable choices will also be available that can make cleanup a cinch.

Holly Marder

Holly Marder

When planning your menu, then think of easy finger foods that are easy to share and serve. The spread displayed comprises cheeses, crackers, salami, pesto, fruit along with a newly baked pecan pie.

Tip: To prevent drink spillage, ensure you have a sturdy tray with a lip available.

Holly Marder

Pecan Pie(adapted from Allerhande)
Serves 12

1 cup (250 g) flour
100 g powdered sugar
1 cup (250 g) butter
1/2 teaspoon salt
1 1/4 cups (280 g) whole pecans
1/2 cup (150 g) maple syrup
1/3 cup (75 g) sugar
1/3 cup (75 milliliters) fresh lotion

Timing: prep, 30 minutes; cooking, 50 minutes

1. Preheat the oven to 350 degrees Fahrenheit (180 degrees Celsius). Blend the flour, sugar, butter and salt in a mixer and mix everything into a crumbly dough. Knead the dough into a ball with your hands and line a greased 8- by 8-inch skillet with the dough to form an even base. Bake for 20 minutes. Roast the pecans in the oven in an 8- by 11-inch tray for 10 minutes.

2. Heat the cream and sugar in a saucepan. Bring the mixture to a boil then cook it on low heat for 6 minutes.

3. Remove the gently roasted pecans and pie foundation in the oven. Distribute the pecans on top of the precooked pie foundation, placing them in lines and forming two layers. Carefully pour the caramel sauce on the nuts and put the pan back in the oven for another 20 minutes.

4. Allow the dish to cool completely before serving it in your indoor picnic. Enjoy!

Holly Marder

The Entertainment

After indulging in dialogue, relaxation and food, have a few games available to continue the fun. Ensure that you also prepare a playlist of your favourite holiday tunes to play.

Holly Marder

After unwrapping gifts this Christmas, gather your loved ones for an indoor picnic. Afterward, don’t hesitate to prop yourself in a comfortable spot against some cushions for some quality quiet time with a fantastic book.

Tell us : How will you be getting comfy this winter?

See related

Light-Up Mirrors Offer Bright Design Solutions

I’m often turned on to fresh design trends or merchandise through recommendations from my own clientele or the designer on the project. One of my most recent enjoys is a light-up electrical mirror — yup, it is too fancy as it sounds! This mirror with built-in lighting can solve many design problems. For instance, if a vanity is facing a toilet window, then finding a place to get a mirror and a light fixture can be difficult.

While electrical mirrors can be bought online, using one custom made is an option, too. Take a peek at a few methods to put in this new design element through your bathroom remodel.

Risinger Homes

This glistening powder area is a fantastic use of space. If the mirror did not possess the built-in lighting, the design would be much more complicated. What kind of light could the designer have set up? How big could the mirror happen to be?

The round shape allows for a much larger mirror size and looks fine against the angled ceiling. The simple fact that the mirror is also the light source simplifies the design challenge.

Flüff Designs & Decor

I have heard that side lights make using makeup considerably easier (although I can not say I know from experience). These new mirrors have the identical impact as an old-school Hollywood dressing room mirror, but without the bulbs running down the side.

The light output is great, but care ought to be taken when choosing the type of LED lighting. LED lighting colors can vary from one company to another. Warm and cool whites are available in LED, therefore get a record of both if possible.

Edgewater Design LLC

Here we see a fantastic example of built-in hot white light at a mirror. Warmer white tends to function well with warm-hued paint and tile colors. Cooler white lights work well in white and blue bathrooms.

RKI Interior Design

Yet another design challenge solved with this customized corner mirror.A little vanity at the corner often means you can not get light across the side without shoving a light fixture into the corner. The usage of this next mirror solves this dilemma. It is a clever design and creates a very slick appearance.

Platinum Series by Mark Molthan

The lights for these mirrors can be RGB — LED lights that change colors and turn your mirror into colour therapy. You may select whatever colour makes you feel most happy or relaxed. Imagine taking a bath with all the lights gradually scrolling through numerous colors. Or perhaps you have a migraine and select light purple only, as it is the most relaxing for your pounding head.

If you’re using chromotherapy (colour therapy) or nighttime light elsewhere in the area, I recommend you have the light all from one supplier and don’t mix warm white light with trendy white light at precisely the exact same space.

Bubbles Bathrooms

The sky is the limit in mirror design. It is simple to have mirrors created and sandblasted. The lights can be set up on the back and represented through the sandblasted areas.

By Any Design Ltd..

We installed some solitude film over this toilet’s window and mounted on the electrical mirror on a customized support.

Low-voltage leads to your mirror snake up between the windows at a dado cut and are covered with the original window trimming stock. Each of the wires are encased in certain bend conduit, which protected them when the trimming was emptied.

More: Magic Mirrors Emerge From Fairy Tales

See related

5 Anytime Glad to Rev Up Your House All Year

Now that January is in the past, party season is again upon us. Allow the celebrations begin! Celebrations are instances for sharing special moments with family and friends, like birthdays, weddings and birthdays. Other celebrations are just for the pleasure of it. Parties in my town start with the Super Bowl and just keep on coming until Christmas again. Some celebrations are for universities, charities and churches and are commonly called”party book” occasions.

In case you have been attempting to show off that new kitchen remodel for your friends, use your new barbecue or host a memorable day for the sake of a charity, then below are some party ideas which will surely be the talk of town.

Cost Plus World Market

Chinese New Year Packets, Set of 6 – $2.99

1. Chinese Takeout Party

Chinese New Year is celebrated in February and is now a joyous time of food and traditions. Join in the fun with a small twist by hosting a Chinese takeout party.

The color red is a big part of the celebration. Red envelopes such as these are used to give gifts to friends and family, usually coins or dollar bills.

Horchow

Pagoda Salt and Pepper Set – $60

Set your table with Chinese-inspired reasonable.

Number Four Eleven

Dragon Napkins – $125

It can be quite formal or as casual as you desire. Put the table based on the Chinese zodiac; 2013 is the year of the snake. Find the Chinese place together with all the yummiest takeout in the town and serve it directly from conventional takeout boxes.

Laura U, Inc..

2. Poker Party

Throw a poker night with great food and friends.Make sure to have a lot of finger foods and cold beverages.

Restoration Hardware

Classic Edition Monopoly – $149

You are able to host a family-friendly version of this party using another table for children and traditional board games, such as Monopoly and Bingo.

Restoration Hardware

Town Hall Bingo – $129

Have an older kid keep score for the younger children and have prizes for the winners.

Crate&Barrel

Cuisinart Electric Fondue Set – $69.95

3. Chocolate Fondue Party

This is just one of the’70s. Ideal for girls’ night, the chocolate fondue party is an enjoyable potluck-style party. Have your guests bring sliced fruit, marshmallows or graham crackers.

Jeanette Lunde

Throw in a touch color for the party. Color consistently makes a party festive by creating instant whimsy. Anything hanging from the ceiling is a great start to a celebration.

Charmean Neithart Interiors

Organize the food artfully with other goodies before everyone starts to dip.

John Willis Homes

4. Movie-Night Party

Oscar night is February 24 in 2013. It is a great time to concentrate on films. This is a gathering my children love. This works great when you have a media room or just a big-screen TV. Make tickets and gather them at the door when the kids arrive.

Doug Pitts Construction

Enjoy a lot of conventional movie treats, such as popcorn, soda and ginger pop. Although not the funniest treats for children, every once in a while they make film night even more special.

Oriental Trading Co..

Mini Striped Popcorn Boxes, Set of 24 – $4

Actual popcorn boxes are available at most party stores or online. Personalize the boxes by writing everyone’s name on them.

Dillard Pierce Design Associates

5. Concert Party

Have musical Buddies? Why not have a concert at home? A growing number of people are choosing music rooms in their houses, occasionally turning underused rooms, such as dining rooms, into miniature concert halls.

Tulp Kids

Gakki Percussion Set – AUD 67.50

This sort of party can do the job for kids or adults. Child-friendly tools are simple to find, and playing an instrument is a wonderful hobby to boost in children.

The Cavender Diary

For an adults-only version, set up a bar cart and serve delicious drinks as you listen to your friends share their musical talents.

Tell us about your favourite party heritage below!

See related